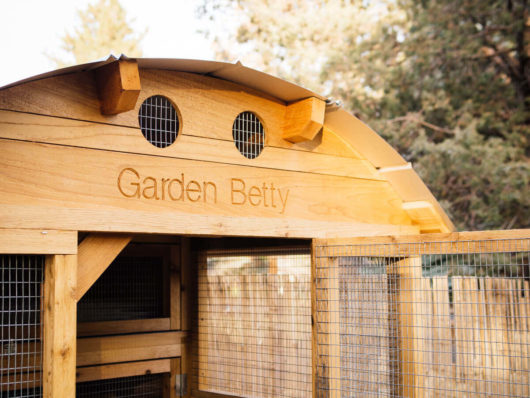
We moved a lot of things from California to Oregon when our family relocated a few months ago, from our favorite plants to our flock of chickens, but the one thing we’re glad we didn’t haul up here is our old chicken coop.
That’s not to say we disliked our tiki coop design — it served us well for six years and we were happy to pass it on to the next owners, who were hoping to raise a flock of their own. In fact, they asked if we’d leave it behind, as we had planned on disassembling the structure and salvaging some of the wood.
But the tiki coop was originally designed for a mild Southern California climate, and we knew we needed something that could stand up to Central Oregon’s snowy winters. One of the hot topics before our move was, Should we build or should we buy?
We love a good DIY project around here and building a chicken coop is kind of like building a super scaled-down house, which is Will’s dream! (One day…) But after much debate, we agreed to buy a prefabricated coop for the sake of saving time and stress after a major move.
It took a long time to find a coop that ticked off all the boxes as far as cost, quality, size, and features. Many prebuilt coops seemed to fall under two categories: budget (under $400) or big money (over $3,000). There were very few in between that looked like they’d last beyond a couple of years in inclement weather.
But then I came across a family-owned business in Texas called Urban Coop Company, and knew I’d found a good match for our flock. They specialize in hand-built cedar coops from their own designs, and while the coops are definitely on the pricier side, the added features (which I couldn’t find elsewhere) made them an excellent value. (Full disclosure: Urban Coop Company gave me a generous discount on the full package I’m about to show you, but no reviews or endorsements were expected in return, so this post was not sponsored by them.)
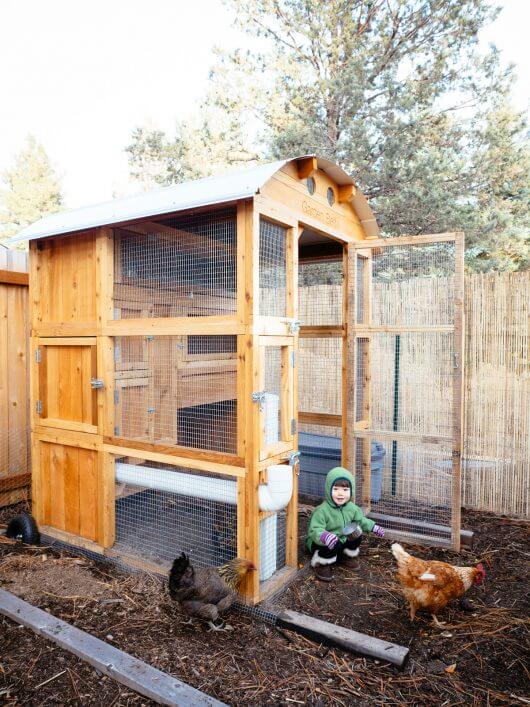
For our four hens, I went with the Round-Top Stand-Up Chicken Coop and chose to have it delivered fully assembled. (Tip: I ordered this coop in the fall when they were running their off-season specials, making all the extra bells and whistles highly affordable. It seems like the greatest deals can be had in fall and winter, if you’re budgeting for the best time to buy.)
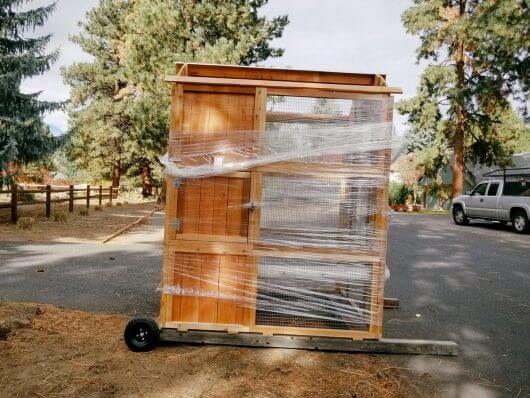
The coop would be delivered via UPS Freight and since the truck would only drop it off on the edge of our property, we needed a way to move a 400-pound structure from the driveway to our backyard. Will constructed a rudimentary tractor base using a few 2x4s and rubber wheels, with the idea that the truck could unload the coop on top of the tractor and we could then wheel it into the yard.


The day the truck came, I was shocked at just how burly of a delivery it was! The fully assembled coop sat on a pallet, tightly wrapped in plastic. It took Will and the delivery driver a solid 30 minutes to pull it out, place it on the lift, and position it onto our tractor. We also bolted the coop to the tractor so we could move it across our property securely.
You might notice part of the galvanized metal roof missing in these pictures — I didn’t know this until we unwrapped the coop, but sections of the roof were damaged during shipment. I’d wondered how they were able to ship an entire coop in one piece without padding material, so I wasn’t too surprised by the damage. But I was still bummed.
To Urban Coop Company’s credit, they responded to my email right away and offered to send replacement parts (that we’d have to swap out ourselves) or a brand-new coop altogether. Since every coop is made to order, we couldn’t afford to wait another three weeks so we opted to receive replacements.
(Meanwhile, temperatures were starting to drop with the transition into fall and our chickens, who had been bunking in our insulated garage for a couple of weeks, were probably sad to be booted from their warm, cozy sleeping quarters soon…)



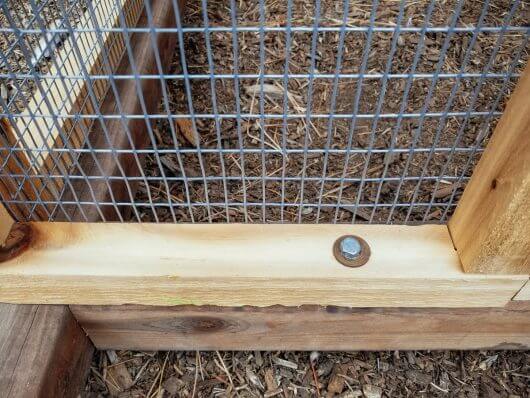
When all the replacement boards and roof panels arrived, we removed the damaged pieces on the coop and screwed on the new parts. We also reinforced the bottom of the coop with 1/2-inch hardware cloth (securely stapled to all sides) to deter digging critters. (The original design is open on the bottom.)
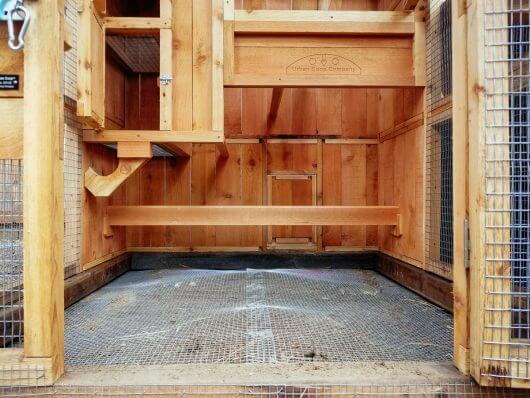
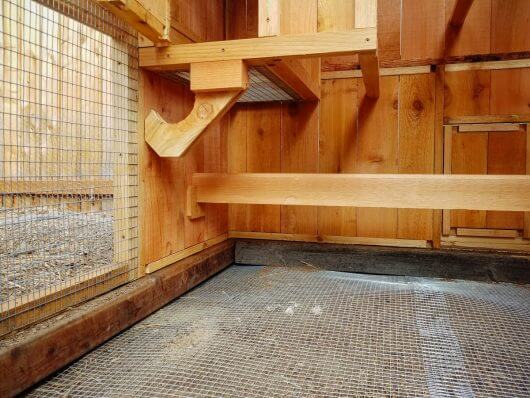
I debated between shavings and sand for the floor, as we’d used both in our previous coop and run, but the new coop only had one large area to fill with its roost-over-run design. Shavings make excellent compost, but we won’t be in our current house for long so we have no long-term composting plans. (And I worried about maintaining it in wetter weather.) Sand has many benefits: cheap, easy to clean, easy to keep looking clean, instant dust baths, droppings dry out faster, and uneaten feed stays on top (meaning less waste when it came to food).
Ultimately, I chose sand as I’d had a great experience with it in our last coop, and it blended in well with our high desert surroundings. I purchased washed construction-grade sand (also called plaster sand or all-purpose sand) from a local gravel yard and wheelbarrowed it into the coop.
Time will tell how sand fares in all four seasons in Central Oregon, but so far, I’ve had no issues with it. I sprinkle in a little Sweet PDZ to help control moisture and odor, and it’s nearly hands off after that. (Tip: If you have a large coop and run, the horse stall version of Sweet PDZ is a more economical purchase.)
The coop is sort of a modified open-air design, in that it’s walled off but open below to the run. At bedtime, the chickens simply hop up a series of roosts until they reach the topmost roost.
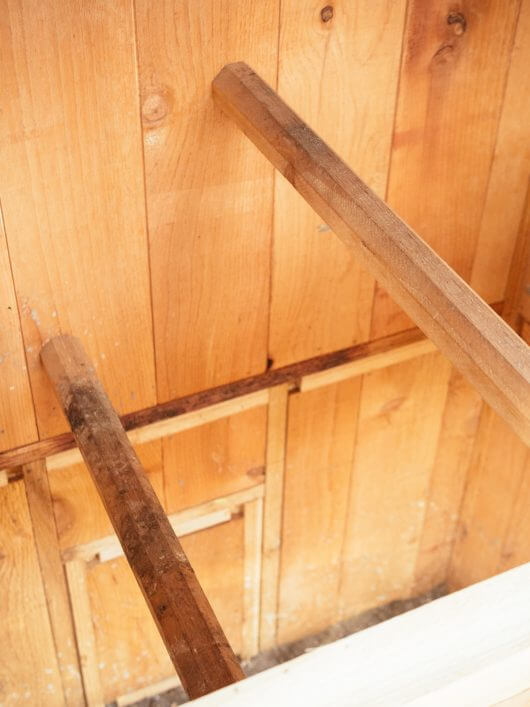
Their droppings fall down into the run, which is easily raked and scooped out with a large kitty litter scoop. (I recently discovered this long-handled scoop that’s going in my shopping cart!) I love this design as it makes cleaning so easy and quick, and I only have to manage one material (sand) at ground level.
Let’s talk about the run for a minute. Urban Coop Company rates the Round-Top as appropriate for six chickens, which means our flock is almost at max capacity. And there’s ample room in the coop for all the ladies to roost comfortably, but I question the size of the actual run area.
It’s fine for chickens that free-range during the day (as ours do), but I really wouldn’t consider it spacious enough for full-time living if you can’t let your chickens out. In my opinion, anyone wanting to keep six chickens in this coop should build a run off the rear pop door.
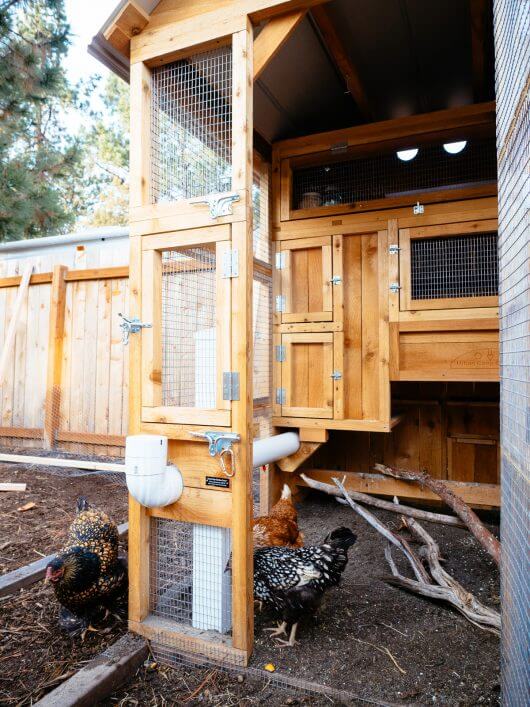
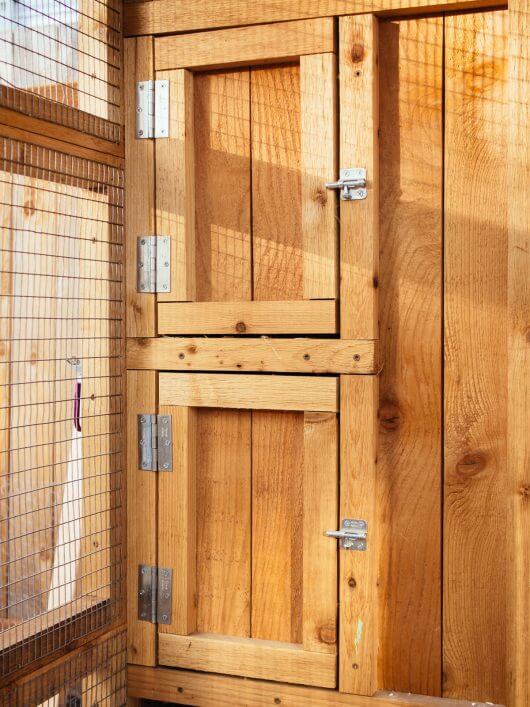
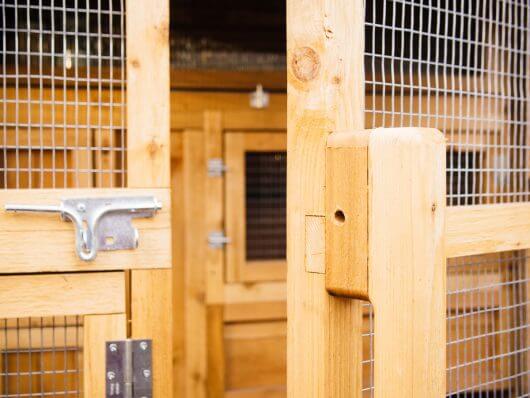
Speaking of doors, there are plenty in this structure and they’re incredibly well built. A full-size door gives walk-in access to the coop, and several smaller doors provide quick and convenient access to the feeder, waterer, nest boxes (from inside and out), roosts, and storage area.
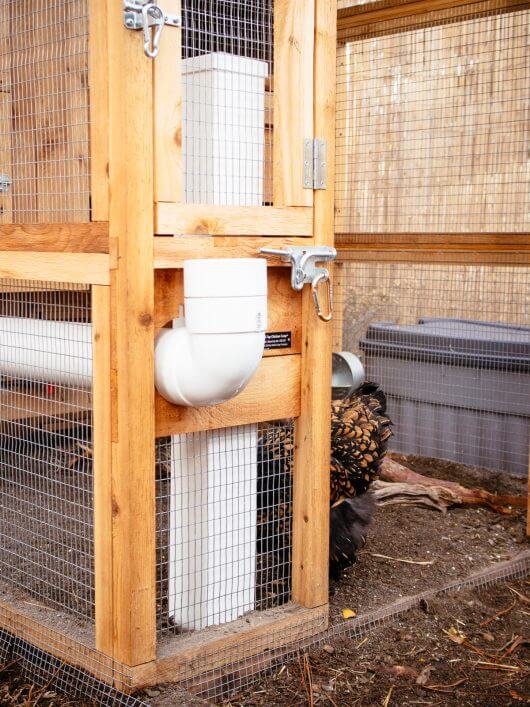
The feeder and waterer are based on designs you may have come across in backyard chicken-keeping forums before. They’re simple and genius, take up very little space, keep messes to a minimum, and most importantly, keep all poop out. The feeder is a tall, food-grade PVC tube that dispenses chicken feed by gravity. (This homemade seed and grain mix is what I feed my flock.) You refill it from the top as needed, and can do so through the little door that opens from outside the coop.
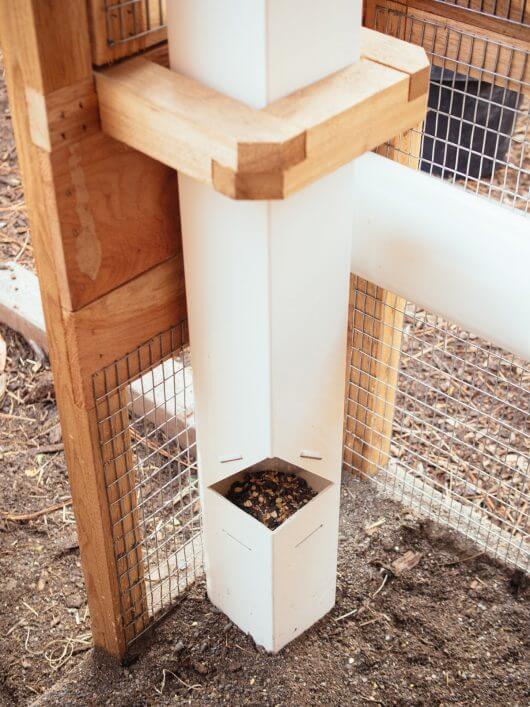
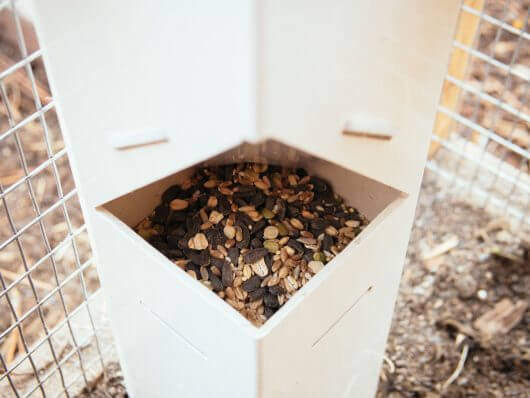
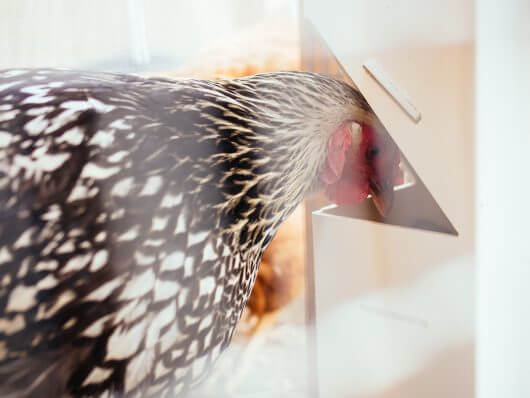
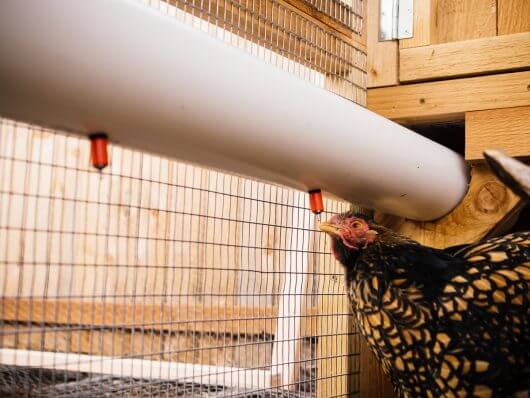
The waterer uses a nipple system attached to a PVC tube, and is easily refilled from outside the coop as well. I’m a longtime fan of nipple systems for chickens as it keeps the water cleaner and reduces the amount of water they splash out of a traditional fountain. The nipples do freeze in frigid weather, however, so we utilize this heated water bowl in winter.
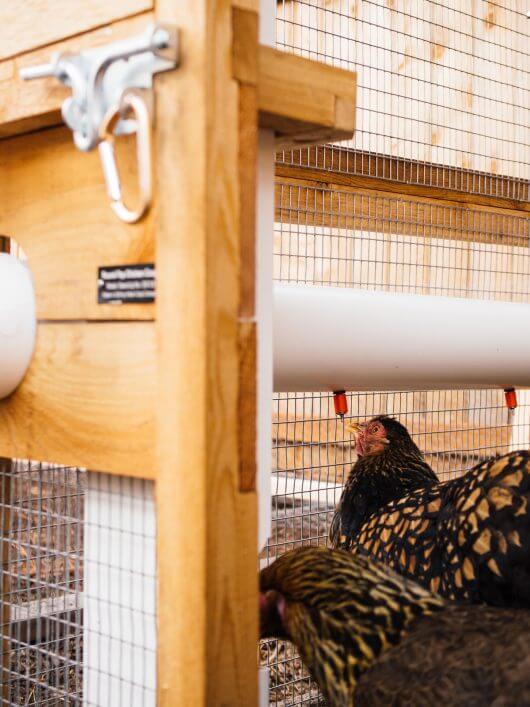
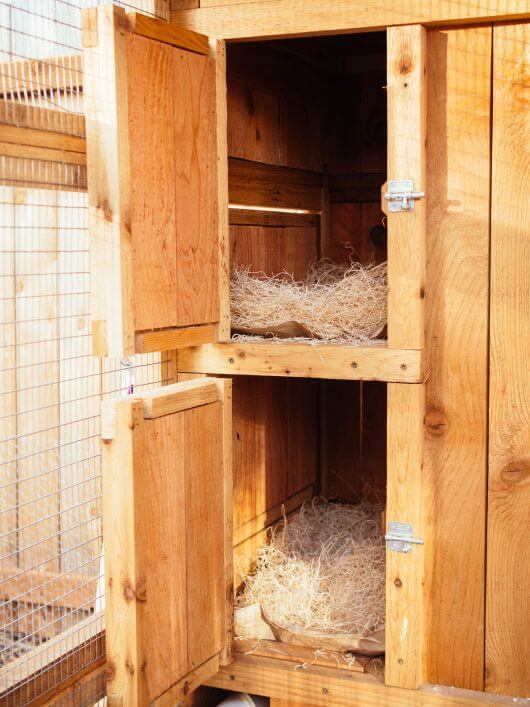
There are two nest boxes and we lined them with a moisture-absorbing material that I’m really liking so far. They fluff out nicely like natural nesting material, and since we use sand in the run and the chickens only sit in the nests to lay, we rarely get poopy eggs.


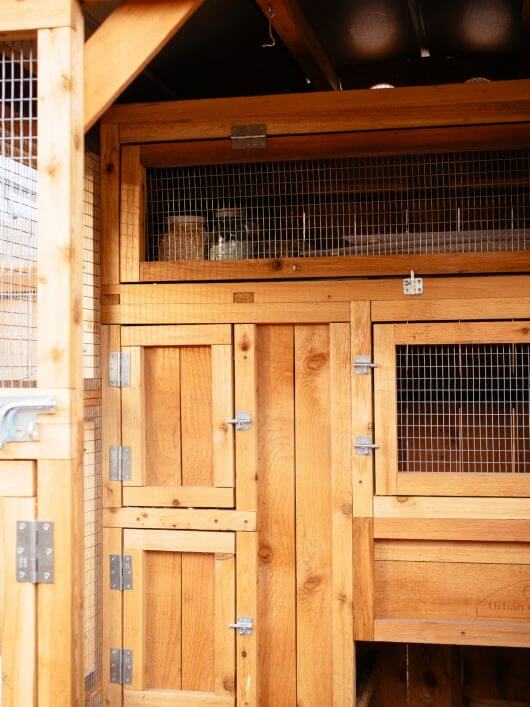
The storage area above the nests and roosts can hold a few supplies, such as jars of treats (my current favorite is dried black soldier fly larvae) and the aforementioned litter scoops, but aren’t designed for large bags of feed. What they’re actually meant to store are the twinwall plastic storm panels, an add-on option for chicken-keepers in cold climates.

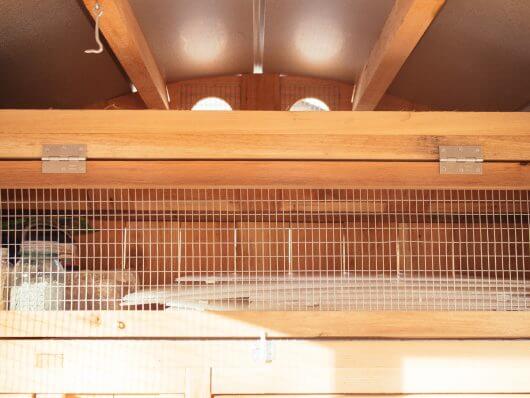
Essentially translucent corrugated plastic sheets, the lightweight waterproof storm panels are cut to size to fit every single window and door perfectly. They attach via magnets and can be placed as needed for blocking wind, rain, or snow on any part of the coop. I think they are brilliant!
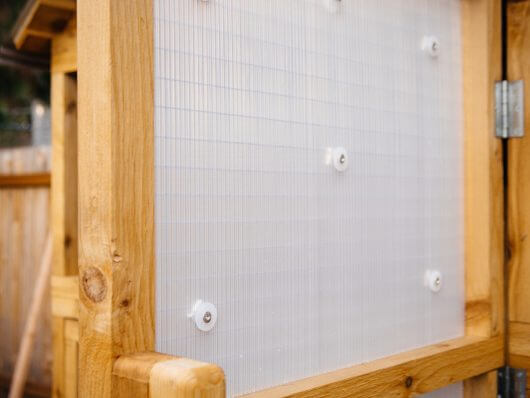
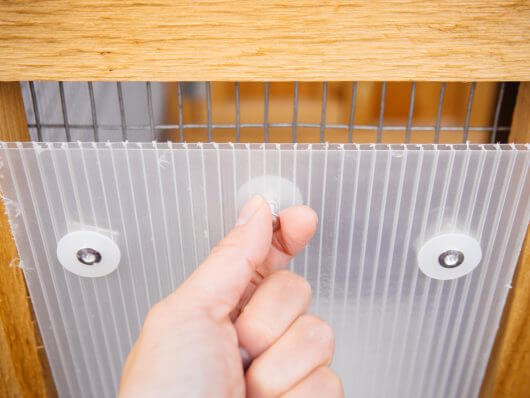
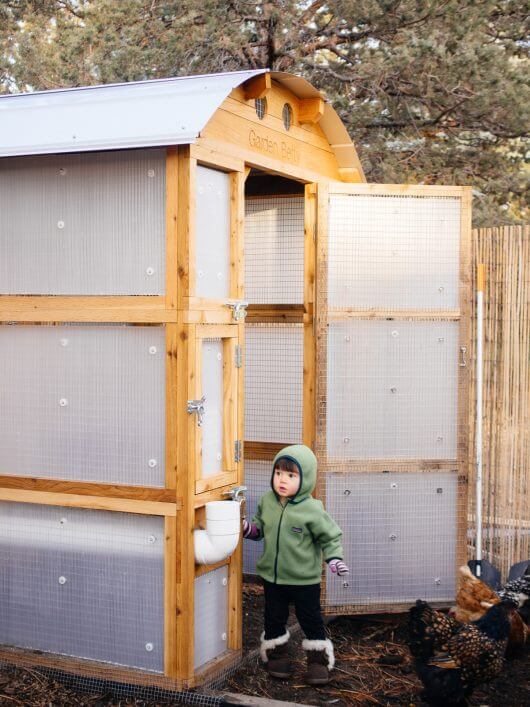
They do a good job of minimizing drafts while still allowing for decent ventilation. We have a humidity sensor in the coop (hung right next to the roosts) that communicates with a digital hygrometer inside our house so we can monitor the temperature and humidity. We keep the hygrometer on our kitchen counter and for the first few weeks when Bend was going through a cold spell, I was obsessively checking it 10 times a day!
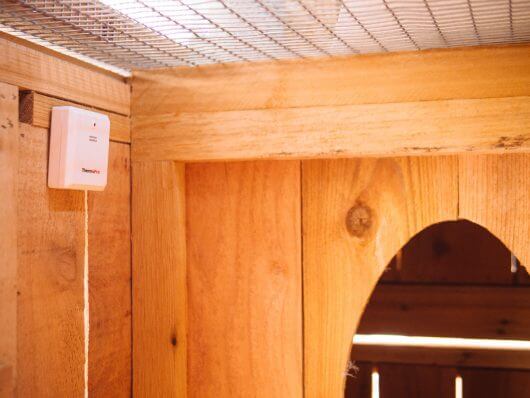
Even though temperatures dipped into the teens at night, humidity levels never rose above 70 percent. The storm panels provided a layer of weatherproofing without sealing the coop airtight, so they kept our girls safe from frostbite (which, contrary to popular belief, is usually caused by high humidity in the cold — a result of improper ventilation — and not cold temperatures themselves).
We hung a small metal feeder (the same one we used during the move) filled with oyster shells and added a few branches to “naturalize” the run. During the day, the ladies roam freely within a large fenced-off area. Before sunset, they return to the coop to roost and we lock them in manually.
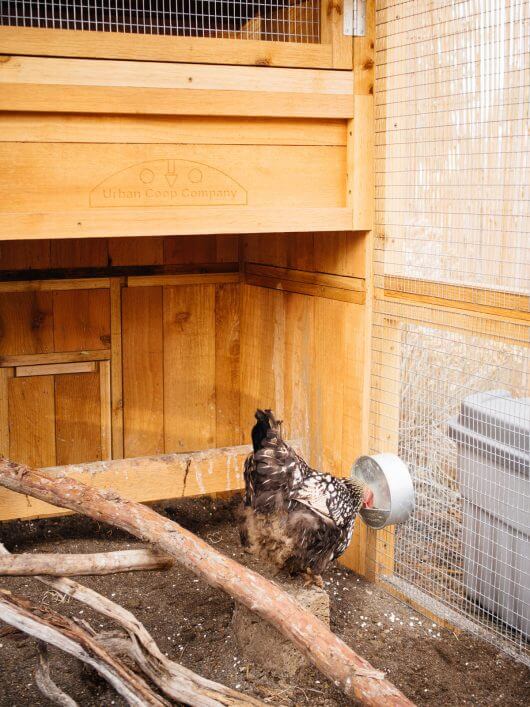
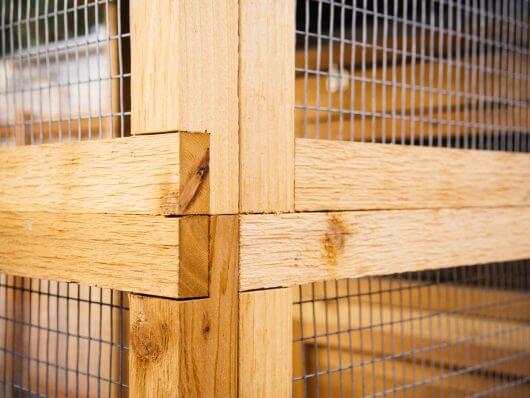
In the future we’d like to paint to match our house, add an automatic pop door, and build a fully enclosed attached run for days that we’re out of town and can’t let the chickens free-range, but for now, the new coop is working out great. The craftsmanship is excellent with its sturdy joinery and welded galvanized livestock wire (rated stronger than hardware cloth), and the structure has survived some heavy wind and rain so far.
Most importantly, the chickens have really taken a liking to their new home, and they’ve been thriving and laying steadily since the big move!
Chicken Coop Sources
YardGard 1/2-Inch Galvanized Mesh Garden Cloth | Sweet PDZ Coop Refresher | Sweet PDZ Horse Stall Refresher Powder | DuraScoop Jumbo Cat Litter Scoop | In-N-Vations by Dee Purrr-fect Scoop | K&H Pet Products Therma-Bowl | Precision Pet Excelsior Chicken Nesting Pads | Scratch and Peck Feeds Cluckin’ Good Grubs | ThermoPro TP60 Digital Hygrometer with Temperature Gauge | Little Giant Galvanized Hanging Feeder | Scratch and Peck Feeds Cluckin’ Good Oyster Shell
The post A Tour of My New Chicken Coop appeared first on Garden Betty.
from Garden Betty http://ift.tt/2sP5UeS
 Turn on your JavaScript to view content
No comments:
Post a Comment