Thursday, May 31, 2018

601 Beach Crescent in Vancouver

601 Beach Crescent by Pinnacle International is a new 52-storey highrise development located on the east side of the Granville Street Bridge, in Downtown Vancouver. The proposal calls for approximately 300 market homes within the tower, plus a large lot-spanning podium with 152 non-market housing units, with a total square footage of 126,710 square feet. The non-market housing unit mix is 13% studios, 50% one-bedroom, 20% two-bedroom and 16% three-bedroom.

The post 601 Beach Crescent in Vancouver appeared first on Vancouver New Condos.


from Buildings – Vancouver New Condos https://ift.tt/2svqPAv

Wednesday, May 30, 2018

Cedar Creek in the heart of South Burnaby

Ledingham McAllister is excited to announce the launch of Cedar Creek, coming soon to the heart of South Burnaby. Inspired by the majestic Cedar, these six-storey, wood-frame residences embody West Coast design and convenient living in the established Edmonds neighbourhood. A fresh new community within walking distance of shopping, education, entertainment, recreation, SkyTrain, and every conceivable amenity for easy and active living.This beautiful collection of 1 bedroom and den to 3 bedroom homes, ranging in size from 635 to 995 sq.ft., all boast overheight ceilings, open floor plans, premium appliances and extensive glazing for the brightest and most livable of homes.

The post Cedar Creek in the heart of South Burnaby appeared first on Vancouver New Condos.


from Buildings – Vancouver New Condos https://ift.tt/2xsPivZ

Monday, May 28, 2018

Marca by Mortise in South Surrey

Marca by Mortise is a new townhouse development located in South Surrey. Thoughtful touches and contemporary materials come complete with a luxurious set of standard finishes that feel bespoke. Designed to inspire and with the space to match, this community of 18 townhomes is an exclusive opportunity beyond comparison.

The post Marca by Mortise in South Surrey appeared first on Vancouver New Condos.


from Buildings – Vancouver New Condos https://ift.tt/2sdEXyK

Friday, May 25, 2018

Bravo on Broadway in Vancouver

Bravo on Broadway by Legendary Developments is a new townhouse development located at 903 East Broadway. Bravo on Broadway is an urban paradise unlike any other. Nestled in the vibrant neighbourhood of Mt. Pleasant in Vancouver, Bravo boasts striking New England-style architecture that uniquely complements the natural surroundings.

Each Bravo residence has been meticulously planned to maximize functionality and personality. With only 8 suites ranging from 1,186 to 1,422 sqft, along with distinct main-level entries, gourmet kitchens and spa-inspired bathrooms, Bravo is truly the perfect urban retreat.

The post Bravo on Broadway in Vancouver appeared first on Vancouver New Condos.


from Buildings – Vancouver New Condos https://ift.tt/2IP390Q

Grow Bigger and Better Tomatoes This Summer!

Grow Bigger and Better Tomatoes This Summer!

Tomato planting is something I look forward to every spring. I start counting the days from the time I sow my first seed to when I might have that first vine-ripened tomato in my hand, juices dripping down as I take a bite of the sweet, succulent flesh before it even makes it back to the kitchen.

If you've never tasted a homegrown tomato, you haven't truly lived. And if you've never started your own tomato plants from seed, you're definitely missing out — on the thousands and thousands of beautiful, colorful heirlooms that exist in this world.

Take a look! My only advice for choosing tomato seeds is to go with ones you've never heard of before, and to simply start with your favorite color! (I personally love purple and black tomatoes… it might be a mental thing, but I feel the darker the flesh, the smokier and richer it tastes.)

Tomatoes are fairly fuss-free. They don't require any special conditions to sprout and they grow relatively quickly. But once they start producing more foliage, they need a lot of love to perform their best — their best meaning lots of flowers and lots of fruit.

In gardening parlance, tomatoes are called heavy feeders; that is, they require a lot of nutrients. They're wild about fertilizer and before you even think about growing tomatoes, you should think about "growing" your soil first. Tomatoes like rich, amended soil teeming with worms and microbes.

Two key nutrients must be present for tomatoes to thrive: phosphorus, which promotes the growth of flowers and fruit, and calcium, which prevents blossom-end rot (that dreaded black sunken hole on the flower end of your calcium-deficient tomatoes). Providing these nutrients right from the start ensures you'll grow bigger tomatoes that will be the envy of all your neighbors.

To a lesser extent, tomato plants also need nitrogen, but too much nitrogen could result in a big, bushy, and green tomato plant with no flowers.

I start my tomato planting by preparing the bed first. Over an established but empty bed, I spread a 2-inch layer of well aged compost; sometimes it's homemade, if I have enough, and most of the time it's bagged compost.

(If you don't have access to a good, organic, and aged compost locally, Dr. Earth Natural Choice All Purpose Compost is a high-quality amendment that you can buy online. It's also available at some independent garden centers.)

On top of the compost, I apply an all-purpose fertilizer, such as Dr. Earth Premium Gold All Purpose Fertilizer (4-4-4). Those three numbers in parenthesis indicate the nutritional makeup of the fertilizer, also known as N-P-K, or nitrogen, phosphorus, and potassium. It's certainly not the only one you can use, but I like the Dr. Earth line as it's produced by a reputable company and made with organic ingredients.
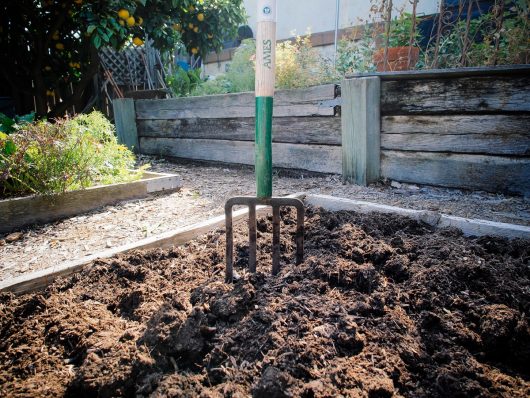
Dig in the compost and fertilizer with a spading fork

Once the compost and fertilizer are evenly spread across the bed, I dig them in with a spading fork (going only as deep as the fork), rake the soil smooth, and water well. I like to let the bed sit for a day or two for the soil to settle back in before I plant.
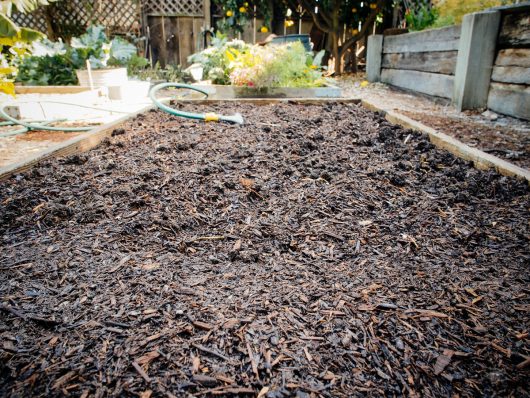
Freshly prepared garden bed

So, tomatoes. Let's get planting!

Generally, I start my seeds in late winter, move the seedlings into 4-inch pots in early spring, and depending on how things are going in the garden, they get moved again into gallon pots or they go straight in the ground. (Your seeding and planting schedule may vary with your particular climate, microclimate, and expected frost dates.)
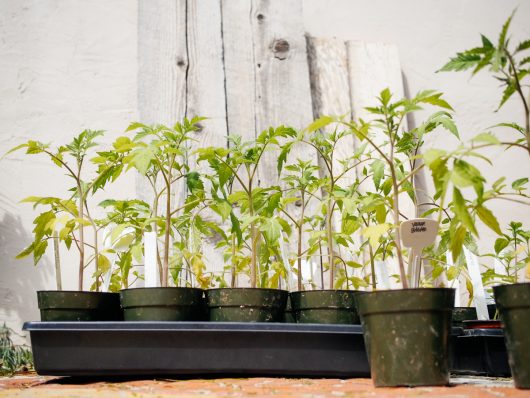
Tomato seedlings hardened off

I always start with healthy plants about a foot tall, whether it's a foot tall in a 4-inch pot or a foot tall in a gallon pot. This fine specimen spent a week outside getting hardened off, and looks primed for the garden.
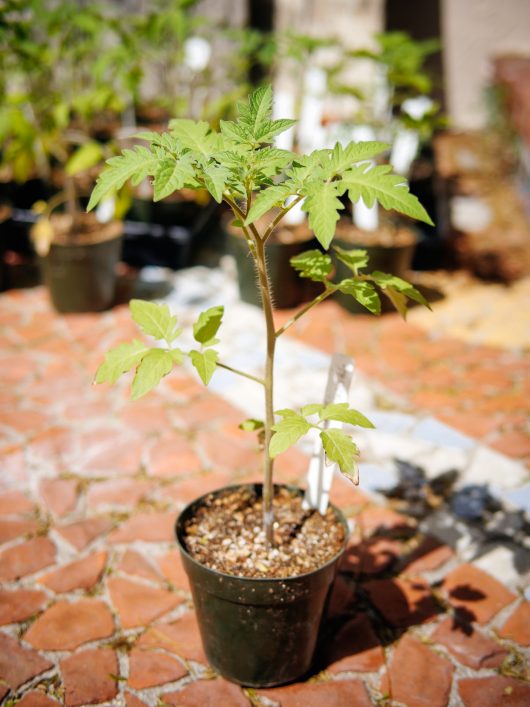
Healthy tomato seedling

A couple of days before I transplant, I shower my tomato plants with aspirin spray to prepare them for the move. Aspirin (the same stuff you can find at the pharmacy) contains salicylic acid, a chemical compound that's naturally present in most plants.

Use aspirin to boost plant immunity

Studies have found that in a tomato plant, salicylic acid (a plant hormone) is produced at high levels in response to a microbial attack on the plant. Oftentimes, this response happens too late in the natural cycle. But since we know salicylic acid triggers the plant's defense system, we can give our tomato seedlings a little immunity boost before they go in the garden and have to face all kinds of microbes, good and bad.

To make a foliar spray, dissolve a regular-strength aspirin tablet (325 mg) in a gallon-size sprayer or watering can. Try to find uncoated aspirin as it dissolves easier; no need for brand names, I looked for the cheapest aspirin at my local CVS and found a generic version on sale for 24 cents for a bottle of 120 tabs.

Thoroughly spray all the leaves, making sure to get the undersides.
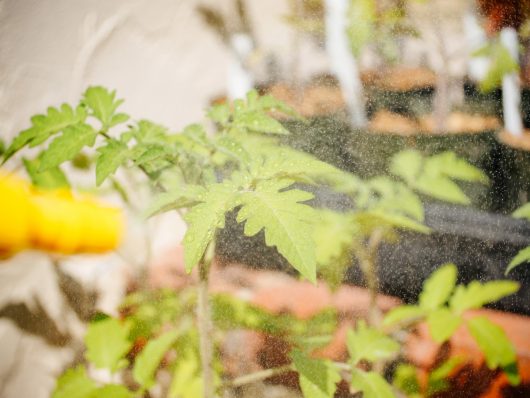
Aspirin foliar spray to boost plant immunity

Spray the undersides of the leaves

After a couple of days, your tomatoes are ready for the dirt. Try to avoid transplanting in the middle of a glaringly sunny day or a ferociously windy day, which could add undue stress to the plant. Wait for a bit of cloud cover, or transplant in late afternoon when the sun is lower and your tomatoes have a chance to recover from their transplant shock.

In our freshly prepared bed, dig a 12-inch-deep hole. You want enough room to throw a bunch of amendments down the hole as well as bury the stem up to its lowest set of leaves.

If you're transplanting a larger plant from a gallon-size container, there's no need to dig a 2-foot-deep hole; simply dig a 12-inch-deep trench and plant your tomato sideways.
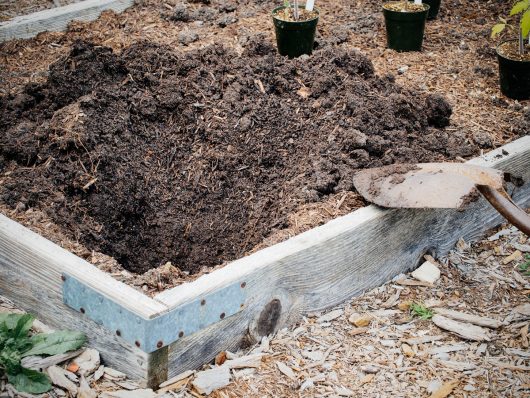
Dig a foot-deep hole

Oh, and if you have a post hole digger, now is a good time to break it out as it makes the deep-hole-digging much easier… or at least, my husband made it look easy, after I'd painstakingly dug the first five holes with a shovel. But his post hole digger holes? Perfect, every time.
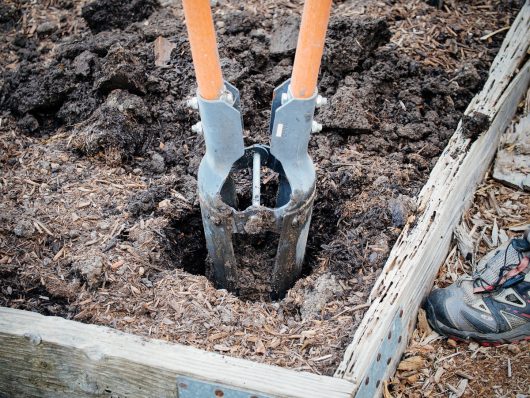
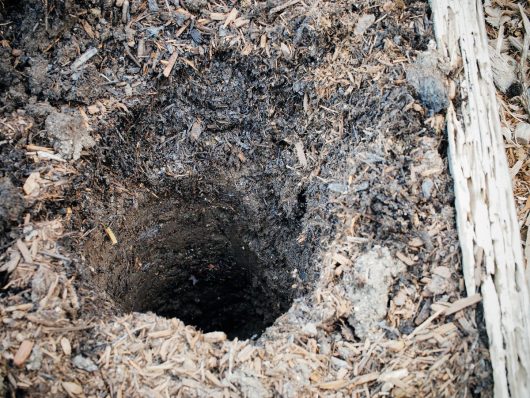
Post hole digger

Post hole

First down the hole: a fish head. I used to get mine from the local fish market for 90 cents a pound, but now I try to save and freeze the heads whenever I procure whole fish. If you're resourceful, you might even find them for free. Call around to restaurants, make friends with fishermen. I use pretty hefty heads that weigh about a pound each.
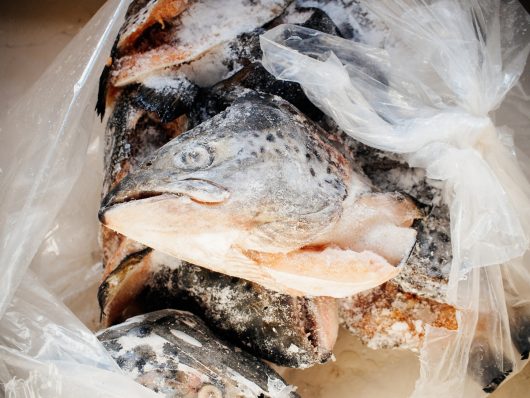
Fish heads

Growing up in a seafood-loving household, I remember watching my parents bury all kinds of seafood (fish heads included) in the garden, and growing some pretty remarkable things for living in the arid landscape of Southern Nevada. And maybe you've heard tales of people burying fish heads under their rosebushes or between rows of crops to fertilize their soil.

Fish heads are not merely folklore in the garden. They've been used as natural fertilizer for centuries all over the world, and in fact, the American Indian Squanto taught the Pilgrims how to sow seeds with a small fish.

Raw fish decays quickly in the ground, releasing nitrogen, phosphorus, calcium, and trace minerals to roots. And as we know, tomatoes especially love phosphorus and calcium!

But you don't have to limit yourself solely to fish heads. Fish guts, fish bones, and shrimp shells all work well too. Use whatever is cheap or free, I say. Buried a foot deep, they're not likely to be dug up by critters — and I have entire families of raccoons patrolling my property every night. (Personally, I think it's too much work for them when they have a veritable buffet of trash cans lined up on the street.)
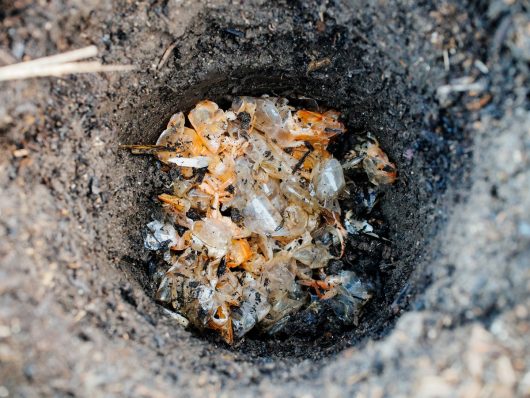
Shrimp shells

Next to go down the hole are two aspirin tabs (immunity boost) and a handful of crushed eggshells (calcium boost).
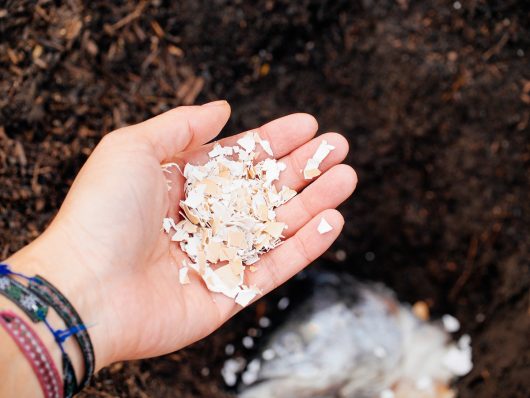
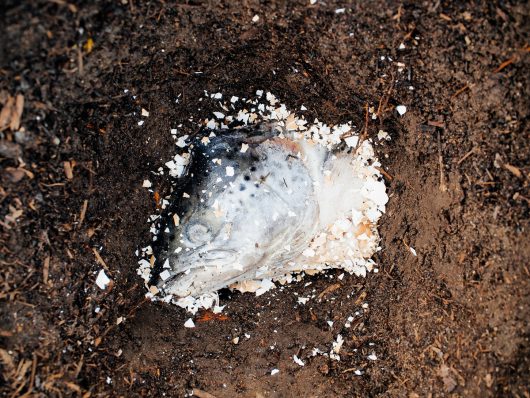
Crushed eggshells from my backyard chickens

Add aspirin and crushed eggshells

Then, I add about a half-cup of fertilizer specially formulated for tomatoes — like Dr. Earth HomeGrown Tomato, Vegetable & Herb Fertilizer (5-7-3) — and about a quarter-cup of bone meal, which is a good organic source of phosphorus and calcium. No measuring cups needed, I just eyeball everything in my trowel.
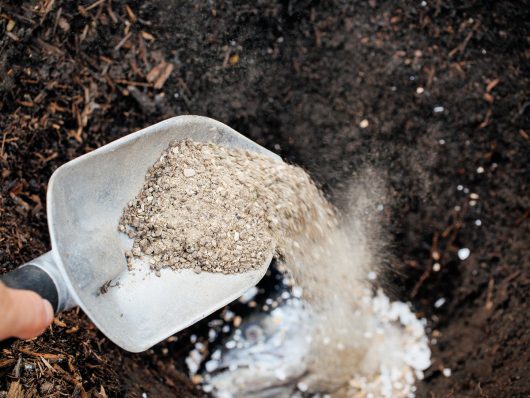
Add all purpose fertilizer and bone meal

I cover these amendments with a couple inches of soil, then water them in. Before the tomato plant goes in, pinch off the lowest two or three sets of leaves on the stem.

Gently loosen the root ball with your hands and lower the plant down the hole. The soil line should be right at the last set of leaves; the rest of the stem gets buried, as new roots will emerge from any part of the stem below ground.
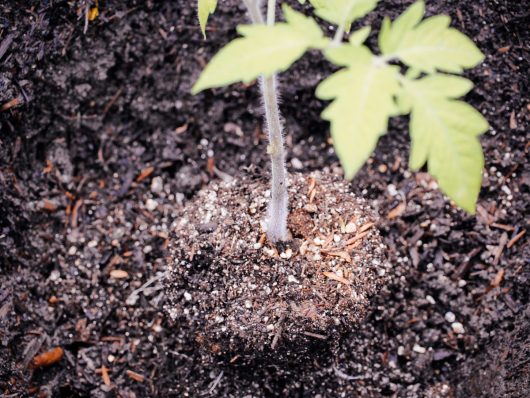
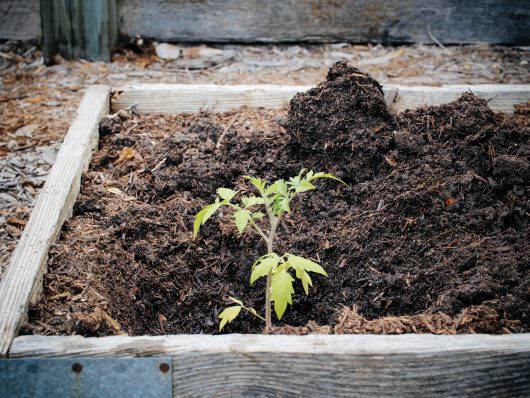
Pinch off the lowest sets of leaves and gently loosen the root ball

Lower the tomato plant down the hole

Backfill the hole with soil (avoid tamping it down vigorously with your hands or trowel, as it will settle naturally) and create a small well around the plant.

Water deeply; you want the water to reach the very bottom of the roots, which are now 8 inches below the surface. I use upwards of a gallon of water per plant, letting the water thoroughly drain into the soil between each soak.
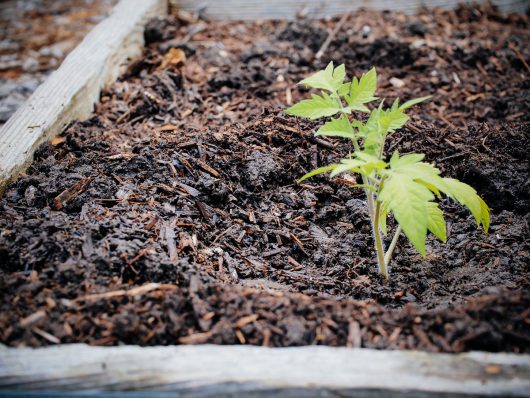
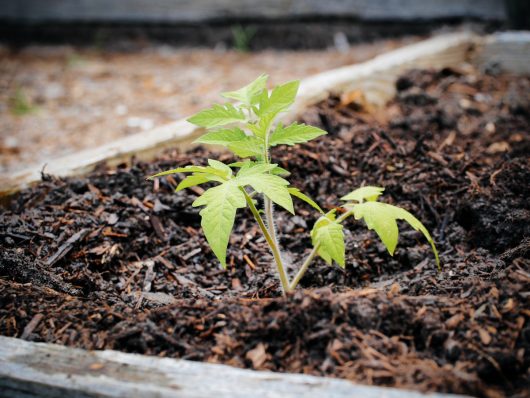
Create a small well around the plant

Successfully transplanted tomato

After that initial watering, your plants will only need a deep watering once or twice a week, depending on your climate. A moisture meter like this one is a good, cheap investment to make sure you aren't underwatering or overwatering. I generally water tomatoes when the first 3 inches of soil feels dry to the touch; remember, their roots are waaaay down there, especially as the season goes on.

Space tomato plants at least 2 to 3 feet apart so they have plenty of air flow between the foliage. I usually wait until my plants are at least a foot tall (and the leaves are further from the soil) before I mulch the bed with straw. Mulch holds in moisture, and any dampness on or near the leaves can lead to disease, especially on a susceptible young plant.

For staking options, I personally like the Florida weave method if I'm growing rows of tomato plants, but plenty of caging options exist. If you plan to grow tomatoes year after year, invest in hefty, sturdy cages, and not the cheap, flimsy metal ones that look like upside-down cones. Stake your plants sooner than later, before the roots have a chance to sprawl and you risk damaging and disturbing them.

Feed your plants throughout the season with your preferred fertilizer; I alternate between tomato fertilizer and fish fertilizer, and always see accelerated growth with loads of blossoms.

Come summer, those once-little seedlings will turn into thick, verdant vines laden with luscious tomatoes!

Gardening Sources

Turn on your JavaScript to view content
Dr. Earth Natural Choice All Purpose Compost | Dr. Earth Premium Gold All Purpose Fertilizer | Ames 4-Tine Forged Spading Fork | GeriCare Uncoated Aspirin | Chapin 1-Gallon Home and Garden Sprayer | Fiskars Steel Posthole Digger | Dr. Earth HomeGrown Tomato, Vegetable & Herb Fertilizer | Dr. Earth Premium Bone Meal | Dr. Meter Moisture Sensor | Neptune's Harvest Organic Hydrolized Fish & Seaweed Fertilizer

This post updated from an article that originally appeared on March 31, 2014.

The post Grow Bigger and Better Tomatoes This Summer! appeared first on Garden Betty.


Spring is here! And to help you figure out what to do with all those weird vegetables and parts you thought you couldn't eat, The CSA Cookbook makes an excellent addition to your cooking or gardening library.


from Garden Betty https://ift.tt/2GP763O

Monday, May 21, 2018

Bloomin’ Onion: Why Some Onions Have Flowers

Bloomin’ Onion: Why Some Onions Have Flowers

Over the weekend, surrounded by fragrant allium blooms, I harvested the last of last season’s crop — a mix of red, white, and yellow onions that I had grown from seed back in October. I loved the display of pompom-like flowers, even though onions are not supposed to bolt (and why not?). Even then, only a handful of onions out of the hundred I had planted had bolted.

What causes some onions to flower while others do not?

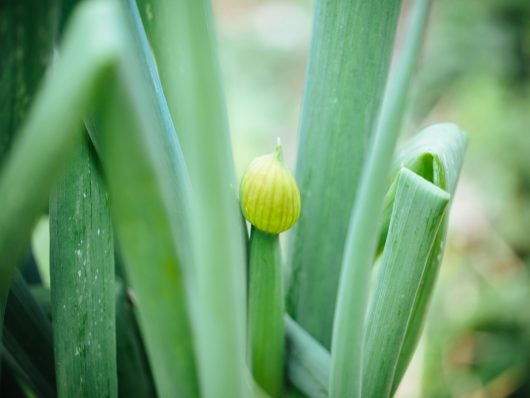
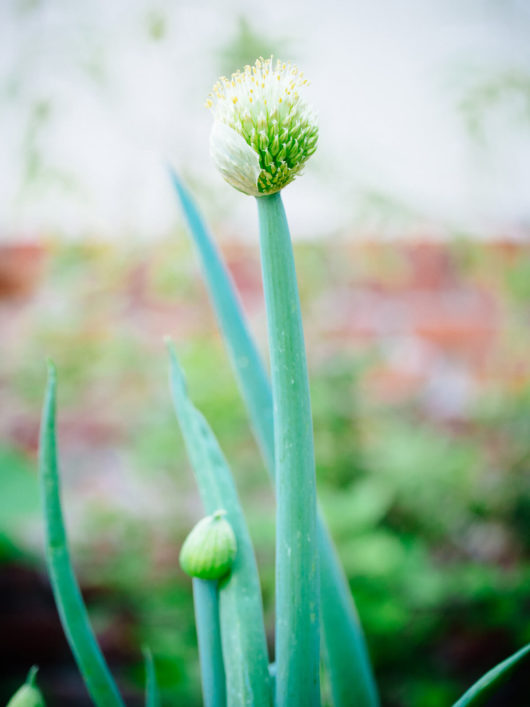
A flower stalk from an onion

Onions are biennial plants. They don’t set seed until their second year of growth. During the first year, the leaves gather energy through photosynthesis and use the energy to develop the bulbs underground. As autumn rolls around, the leaves wither and the onions go dormant.

We usually harvest onions at the end of their first year, when their leaves start to die back. But if left in the ground, the bulbs survive on the stored energy throughout winter, and new leaves and roots will re-emerge in the spring. Having gone through the complete growing cycle, onions will also send up flower stalks (a process called bolting) and produce seed in this second year.

Even if you are only growing onions for one season, temperature fluctuations can deceive onions into completing their life cycle prematurely. If the weather is warm during the early stages, onion seedlings will grow vigorously until cold weather slows their development.

If a cold snap suddenly occurs, the onions will have grown to sufficient size to sustain flowering and be forced into early dormancy.

As the weather warms again, they may be confused into believing they have already gone through two growing seasons and must set seed for the next generation of onions.

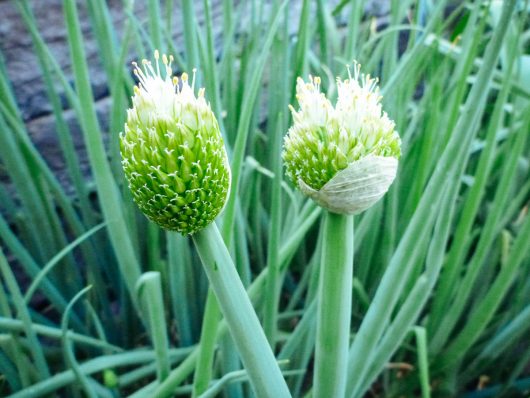
Flowering onions

An onion producing seed

If young seedlings are less than the diameter of a pencil by the time temperatures drop, they are not affected by their first winter. Their size is not significant enough to realize the cold is upon them and they must initiate flower stalk production.

Because of this fine line between seasons, determining the right time to plant onions in your zone is important. Too soon, and your whole crop may flower the following spring as the bulbs will have grown enough to think they’ve completed their cycle after winter. Too late, and you may end up with smaller bulbs, if the delicate seedlings are strong enough to withstand winter at all.

An onion plant bolting

Once your onions bolt, their bulbs stop growing and their storage capacity diminishes. Bending over or cutting off the flower stalk will not re-initiate bulb development. The rigid stalk penetrates the bulb and after harvest, its early decay causes the entire onion to decay.

That said, onions that have flowered are still edible. They should be cured, the leaves and flower stalk removed, and the bulb eaten within a couple of months.

Even if you find a few of your onions bolting, all is not lost. You can snip the blossoms to infuse with olive oil or vinegar, or use them as a pretty and tasty garnish on your plate. The flowers (as well as the stems) have a mild onion flavor similar to scallions.

You can also enjoy the flowers while they last and leave the onions in the ground to collect seed for next season — an unexpected benefit!

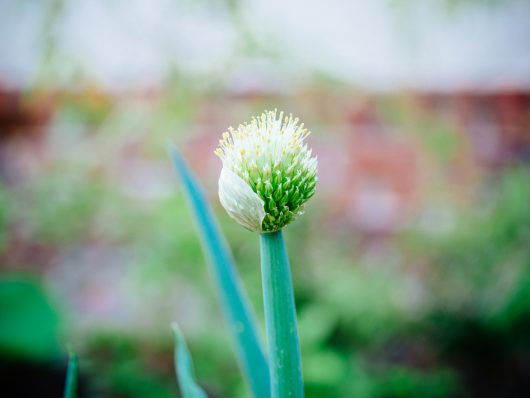
Onion blossom

This post updated from an article that originally appeared on June 20, 2011.

The post Bloomin’ Onion: Why Some Onions Have Flowers appeared first on Garden Betty.


Spring is here! And to help you figure out what to do with all those weird vegetables and parts you thought you couldn't eat, The CSA Cookbook makes an excellent addition to your cooking or gardening library.


from Garden Betty https://ift.tt/2KD3tjR

Sunday, May 20, 2018

Bloomin’ Onion: Why Some Onions Have Flowers

Bloomin' Onion: Why Some Onions Have Flowers

Over the weekend, surrounded by fragrant allium blooms, I harvested the last of last season's crop — a mix of red, white, and yellow onions that I had grown from seed back in October. I loved the display of pompom-like flowers, even though onions are not supposed to bolt (and why not?). Even then, only a handful of onions out of the hundred I had planted had bolted.

What causes some onions to flower while others do not?

A flower stalk from an onion

Onions are biennial plants. They don't set seed until their second year of growth. During the first year, the leaves gather energy through photosynthesis and use the energy to develop the bulbs underground. As autumn rolls around, the leaves wither and the onions go dormant.

We usually harvest onions at the end of their first year, when their leaves start to die back. But if left in the ground, the bulbs survive on the stored energy throughout winter, and new leaves and roots will re-emerge in the spring. Having gone through the complete growing cycle, onions will also send up flower stalks (a process called bolting) and produce seed in this second year.

Even if you are only growing onions for one season, temperature fluctuations can deceive onions into completing their life cycle prematurely. If the weather is warm during the early stages, onion seedlings will grow vigorously until cold weather slows their development.

If a cold snap suddenly occurs, the onions will have grown to sufficient size to sustain flowering and be forced into early dormancy.

As the weather warms again, they may be confused into believing they have already gone through two growing seasons and must set seed for the next generation of onions.

Flowering onions

An onion producing seed

If young seedlings are less than the diameter of a pencil by the time temperatures drop, they are not affected by their first winter. Their size is not significant enough to realize the cold is upon them and they must initiate flower stalk production.

Because of this fine line between seasons, determining the right time to plant onions in your zone is important. Too soon, and your whole crop may flower the following spring as the bulbs will have grown enough to think they've completed their cycle after winter. Too late, and you may end up with smaller bulbs, if the delicate seedlings are strong enough to withstand winter at all.

An onion plant bolting

Once your onions bolt, their bulbs stop growing and their storage capacity diminishes. Bending over or cutting off the flower stalk will not re-initiate bulb development. The rigid stalk penetrates the bulb and after harvest, its early decay causes the entire onion to decay.

That said, onions that have flowered are still edible. They should be cured, the leaves and flower stalk removed, and the bulb eaten within a couple of months.

Even if you find a few of your onions bolting, all is not lost. You can snip the blossoms to infuse with olive oil or vinegar, or use them as a pretty and tasty garnish on your plate. The flowers (as well as the stems) have a mild onion flavor similar to scallions.

You can also enjoy the flowers while they last and leave the onions in the ground to collect seed for next season — an unexpected benefit!

Onion blossom

This post updated from an article that originally appeared on June 20, 2011.

The post Bloomin' Onion: Why Some Onions Have Flowers appeared first on Garden Betty.


Spring is here! And to help you figure out what to do with all those weird vegetables and parts you thought you couldn't eat, The CSA Cookbook makes an excellent addition to your cooking or gardening library.


from Garden Betty https://ift.tt/2KD3tjR

Friday, May 18, 2018

Trellis Townhomes in Port Coquitlam

Trellis by Quantum Properties is a new collection of townhomes located in Port Coquitlam. This project will offer 17 townhomes, sizes range from 1429 to 1516 square feet. Greenbelt living awaits among the park-like grounds at Trellis. The expansive yards and serene landscaping have all been designed in harmony with Trellis Townhomes' unique location. Nestled alongside a gently-flowing watercourse, Port Coquitlam's beautiful Riverside Trail Network starts just a short stroll away.

The post Trellis Townhomes in Port Coquitlam appeared first on Vancouver New Condos.


from Buildings – Vancouver New Condos https://ift.tt/2IWVIb4

Thursday, May 17, 2018

Cambie & 59th by iFortune

Cambie & 59th by iFortune is a new development with two 6-storey concrete buildings. Located at the intersection of Yukon Street and West 59th Avenue. Cambie & 59th overlooks the expanse of Winona Park to the south, while Langara Golf Course and the Langara Trail to the north offer even more green space to enjoy, just steps from your door. This project will offer 63, 1-, 2-, and 3- bedroom luxury condominiums. At Cambie & 59th, it's urban convenience and connectivity that has made this one of Vancouver's most coveted neighborhoods.

The post Cambie & 59th by iFortune appeared first on Vancouver New Condos.


from Buildings – Vancouver New Condos https://ift.tt/2Itpv7S

Wednesday, May 16, 2018

Quick and Easy Kimchi (Even If You Don’t Live Near an Asian Market)

Quick and Easy Kimchi (Even If You Don’t Live Near an Asian Market)

It’s been seven months since I moved to Bend. When I meet new folks in town or talk to friends back home, one of the main questions I’m always asked is, What do I miss most about LA?

Aside from the obvious — our community of friends and the good fortune of having lived near the ocean — the one thing I really, truly miss about being in a big city is the variety of Asian food and Asian markets within close proximity.

Bend certainly has its fair share of excellent foodie-type food (somewhat surprising given its small-ish population), but the closest all-you-can-eat Korean BBQ joints are hours away, as are Asian grocers selling staples that aren’t available in typical supermarket “ethnic aisles.”

But I’m not complaining. I’ll happily take the lifestyle in Central Oregon if it merely means road trips to Portland or Eugene for my Asian fix. (And I don’t really need any excuse to visit those places.)

Before I left LA, I actually went to all my favorite Chinese, Vietnamese, Korean, and Japanese grocers and stocked up on nonperishable items I might need for the next year!

Call me crazy, but I currently have a linen closet that’s stuffed with my favorite brands of organic soy sauce and fish sauce, jasmine and multigrain rices, dried kelp and seaweed paper, Korean sea salt, Korean gochujang and gochugaru, and an assortment of soba, ramen, and rice stick noodles. If the zombie apocalypse were to strike, you can all head to my house and we’ll be able to survive on Asian food for months!

But back to the reason for this post… Kimchi. Kimchi is something we devour frequently in this house, and we use it in a myriad of ways, from traditional kimchi jjigae and kimchi pancakes to pizza toppings and quesadilla fillings. (Though it might it sound weird, a kimchi- and cheese-filled quesadilla is fantastic, as is kimchi grilled cheese.)

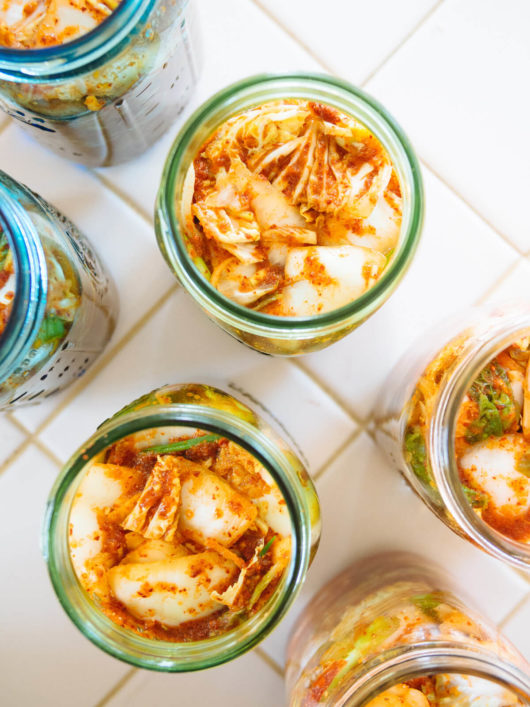
I usually make a large batch of mak kimchi — the easy, “carelessly” cut-up kimchi — and keep a few jars in the fridge at all times. (From what I’ve learned, mak — the Korean word for careless or rough — indicates the shortcut used in this type of preparation, whereby the cabbage is roughly chopped instead of fermented whole.)

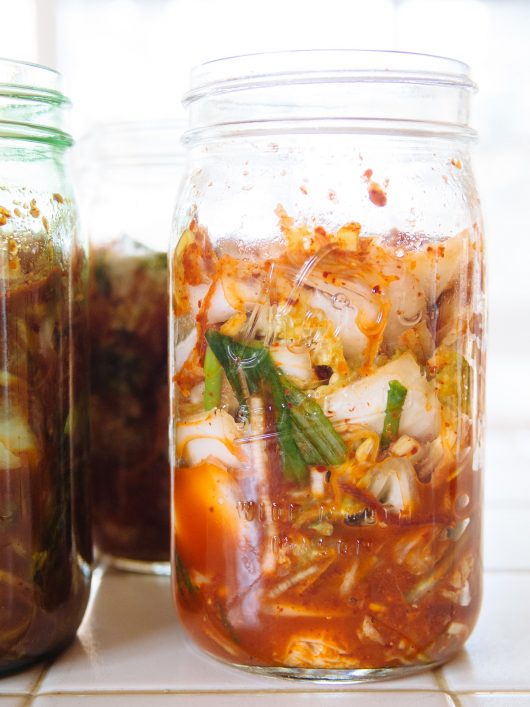
Homemade mak kimchi

I’ve never followed a standard recipe for my kimchi. Sometimes I add fermented shrimp or anchovies, or throw in a handful of perilla leaves or mustard greens. Sometimes I make a sweet porridge for the kimchi sauce, and sometimes I puree an Asian pear for sweetness instead. Some traditional recipes even call for squid or oysters, and the beauty of kimchi is that the flavor varies widely by region, so there is no right or wrong way of making it.

But since being in Bend, I’ve found that fermented shrimp and Asian pears are either impossible to find or very expensive, so I’ve devised a fairly simple sauce that turns out a kimchi just as delicious as my former concoctions. It can be made by anyone, anywhere, without access to an Asian market.

The only things you’ll have to buy online are the gochugaru (Korean red pepper flakes) and perhaps the fish sauce (Red Boat brand is my favorite) if your local market doesn’t carry some basic Asian pantry goods. But all other ingredients are easily found in any well-stocked supermarket, or in your own garden. Perhaps this recipe will inspire you to grow some of them yourself?

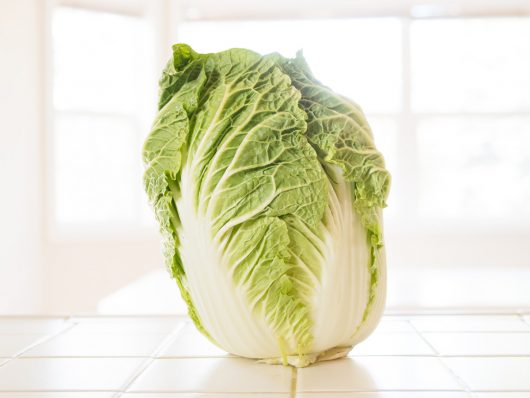
First, we have napa cabbage. This thing was made for kimchi. Its texture (both crisp and tender at the same time) is well suited for the quick fermentation process involved in making (or “ripening”) kimchi. Use the freshest and highest quality cabbage you can find, preferably organic.

Napa cabbage

If you don’t mind a longer fermentation and slightly denser texture, you can use red cabbage for its antioxidant benefits. (I have the recipe right here for red cabbage kimchi!)

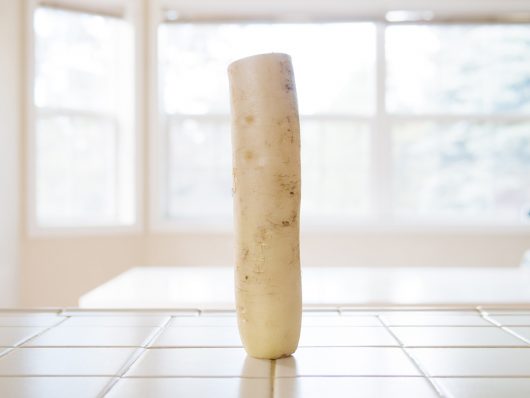
Next, daikon radish or Korean radish (which is just a type of daikon, but more squat in shape). If you can’t find daikon this time of year, you can try another mild winter radish in its place, try a completely different and mildly flavored vegetable altogether (kohlrabi is delicious), or omit it entirely. Spring and summer radishes tend to be peppery or spicy and will give the kimchi a very different flavor.

Daikon radish

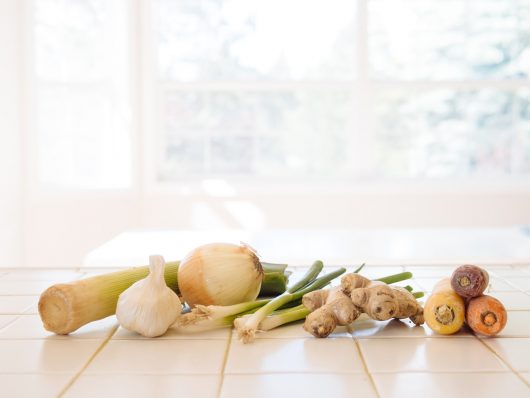
Then, we have carrots, leeks (white and light green parts only), scallions, ginger, onion, and garlic. You’ll be using almost a whole head of garlic in this recipe! (To quickly peel all the cloves, I use this time-saving method from Saveur.)

Leek, garlic, onion, scallions, ginger, and carrots

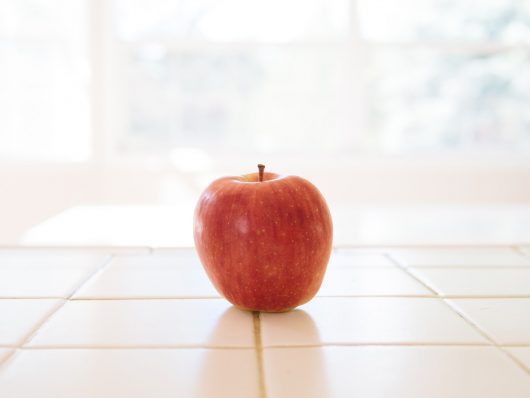
And finally, a sweet, crisp apple to tie all the spices and aromatics together. I typically use a Gala, Fuji, Honeycrisp, or Golden Delicious apple, but any variety that’s more sweet than tart will work. You can also try a pear for added sweetness.

Sweet apple

(As an aside, don’t feel intimidated by the long list of ingredients — half of them will simply be dumped into a blender to make the sauce.)

This easy kimchi recipe can be halved or even doubled. Let’s get to it!

Quick and easy kimchi

Quick and Easy Kimchi

Makes 6 quarts

Ingredients

5 pounds napa cabbage
1/2 cup flaky sea salt or kosher salt
1 1/2 cups julienned daikon
1 1/2 cups julienned carrots
1 1/2 cups thinly sliced leeks (white and light green parts only)
6 scallions, cut into 1-inch segments
1 apple, cored and chopped
2 cups water
1 to 1 1/2 cups gochugaru (depending on heat preference)
1/2 cup fish sauce
1/2 cup finely chopped onion
1/2 cup finely chopped garlic
1 1/2 tablespoons minced ginger

Method

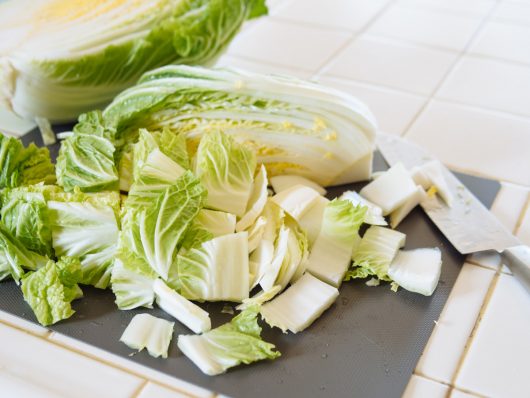
Cut the cabbage into quarters lengthwise. Remove the cores and thinly slice the cores. Roughly chop the rest of the cabbage into 1-inch pieces.

Chop the cabbage into bite-sized pieces

Pile all of the cabbage into a huge bowl or basin; you can also use your sink if it has a stopper. (Note: I used an 8-quart bowl in these images because my larger bowl was already in use. It’s doable but a tight fit. I’ve linked my larger, and preferred, 13-quart bowl in the recipe sources below, which I usually use for full batches.)

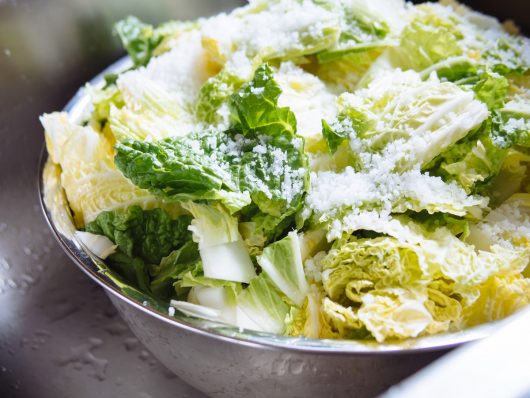
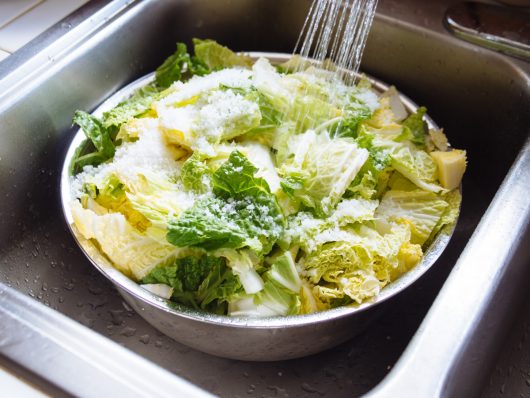
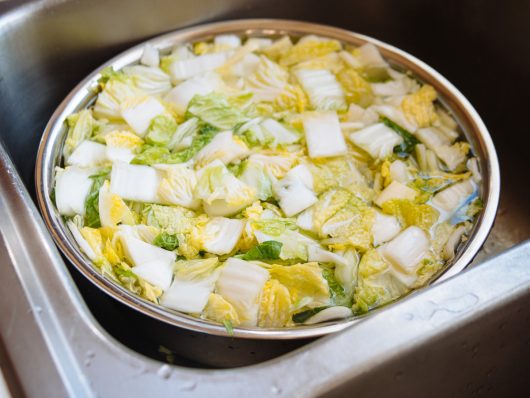
Sprinkle the salt over the cabbage and cover with cold water. Every 30 minutes or so, turn the cabbage over with your hands to distribute the salt evenly. Massage the leaves with your hands to expel more moisture each time.

Salt the cabbage leaves

Soak the cabbage in salted water

After 1 1/2 to 2 hours, strain the cabbage in a large colander and rinse with clean cold water. The leaves should be soft and limp, and the volume of cabbage reduced by half.

The cabbage leaves will turn soft and limp after two hours

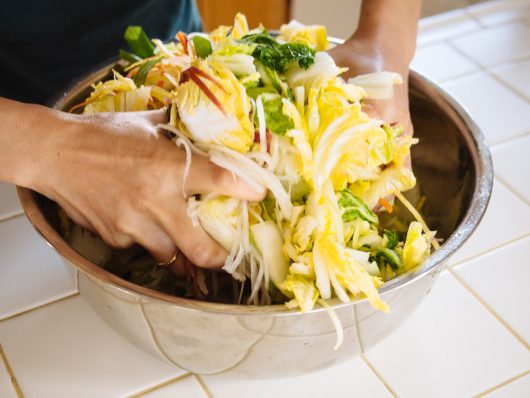
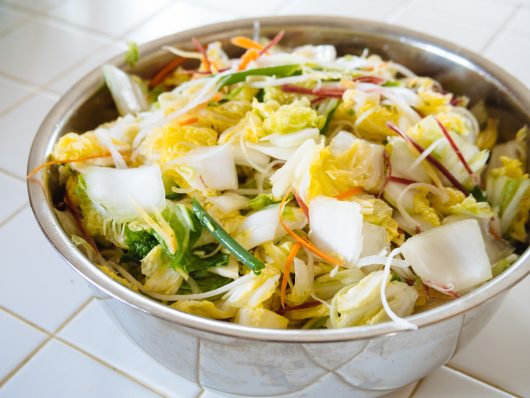
In a large bowl, combine the cabbage with the daikon, carrots, leeks, and scallions. Set aside.

Combine all of the vegetables in a large bowl

Vegetables ready to be fermented for kimchi

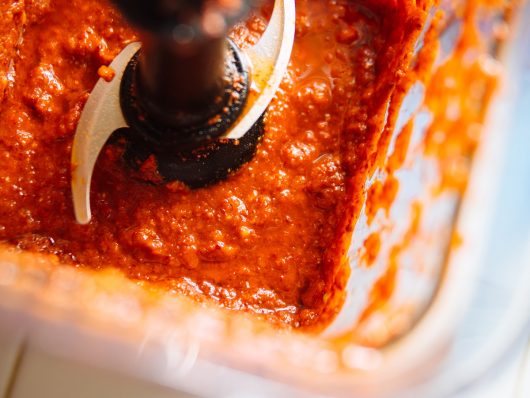
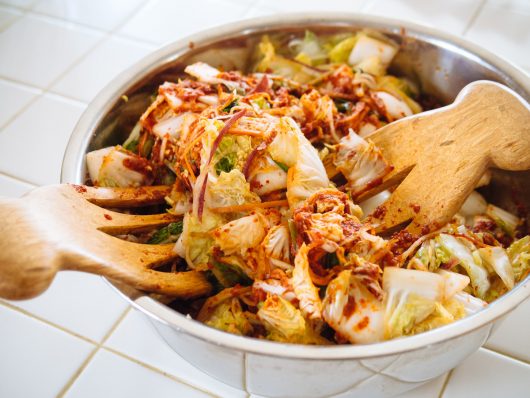
In a blender, puree the apple, water, gochugaru, fish sauce, onion, garlic, and ginger until well blended. Pour the sauce over the vegetables in the bowl, and toss to coat. I use a pair of “salad hands” for this task, but if you want to mix it all together with your hands, be sure to don a pair of gloves so you don’t get the fiery red pepper sauce on your skin!

Blend gochugaru with the apple, onions, and aromatics to make kimchi sauce

Toss the vegetables with kimchi sauce until evenly coated

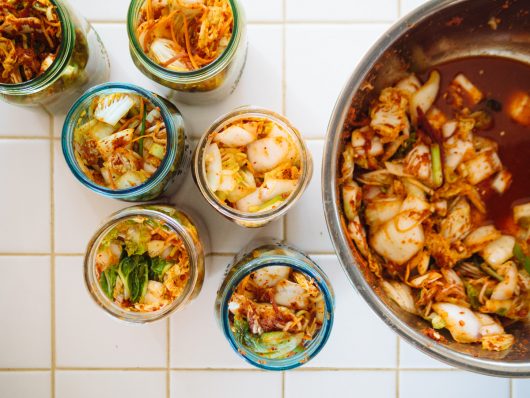
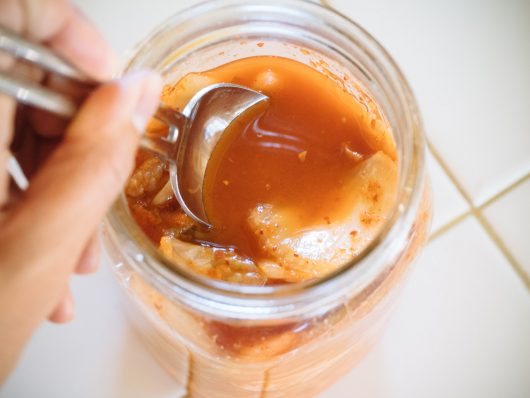
Transfer the kimchi and all the sauce to clean jars, leaving 1 to 2 inches of headspace in each jar to allow room for expansion. Tamp down on the kimchi with a spoon to help release more liquid from the vegetables and keep them submerged in the sauce.

Transfer the kimchi to clean jars

Tamp down on the vegetables to expel more liquid

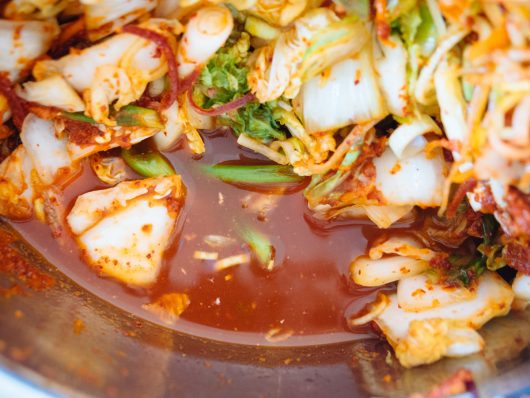
The vegetables will naturally release more liquid as they ferment

Don’t worry if it looks like there isn’t enough sauce in each jar; as the vegetables start to ferment, they’ll release more liquid overnight. Just remember to keep tamping down on the vegetables each day to expel more liquid and help them stay submerged.

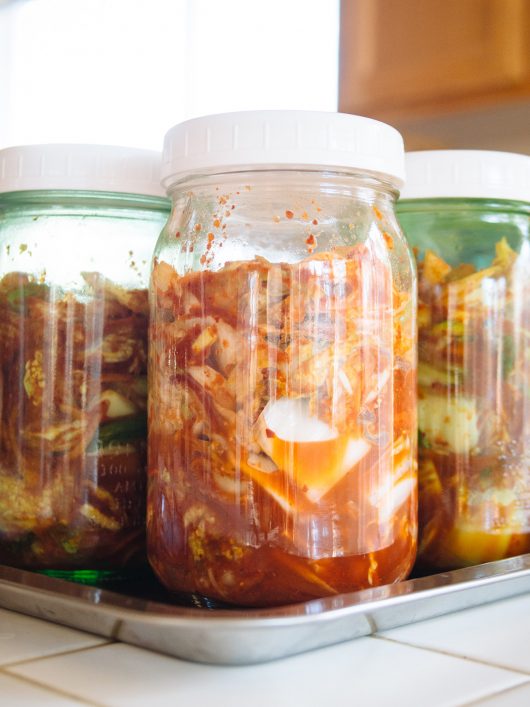
Loosely cover the jars with lids (you don’t want to tighten them too much, as the fermentation gases need space to escape) and place them in a shallow pan to catch any overflow of liquid.

Let the jars ferment at room temperature for three days

Leave the jars out at room temperature, away from direct sunlight, for three days. You’ll start to see small bubbles in the jars, signs that the kimchi is fermenting properly.

On the third day, use a clean utensil to taste the kimchi from one of the jars. If it has a pleasantly tangy taste (thanks to all that beneficial Lactobacilli bacteria brewing in your kimchi) and the flavors are balanced (not too salty or too pungent), the jars are ready to be refrigerated.

(Saying “not too pungent” might seem like an oxymoron when we’re talking kimchi here, but good, fresh kimchi should be crisp, tingly, and lightly acidic with a deep umami layer. It should never have a rotten or “off” smell.)

Refrigerated jars will continue to ferment, but at a much slower rate, leaving you time to enjoy your kimchi. It usually lasts for three to four months before the flavor and texture start to decline (although it never truly goes “bad” since kimchi is a fermented product).

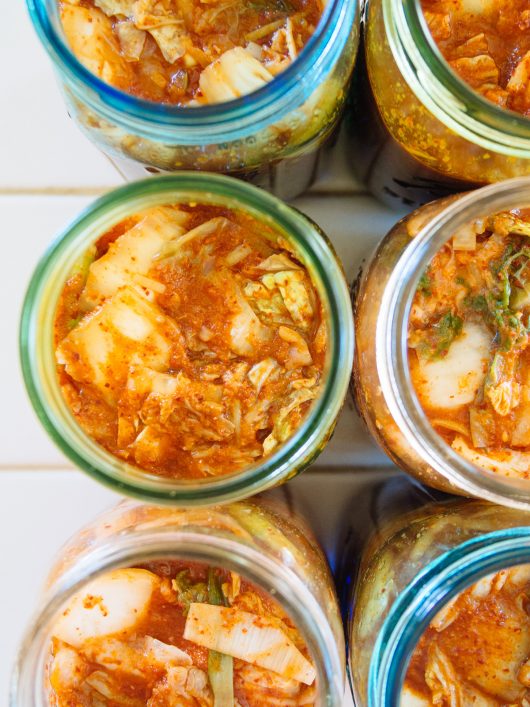
Freshly made kimchi should taste pleasantly sour with a deep umami layer

Lower room temperatures may slow the rate of fermentation, so if your home tends to stay on the cooler side, it may take an extra day or two for the kimchi to ripen. Taste it each day and refrigerate as soon as the flavor develops to your liking. The longer you let it sit, the more sour it will turn (and some people actually prefer it this way, almost like a vinegar pickle).

On the flip side, a very warm house may speed up fermentation, so start tasting your kimchi on day two.

(If you end up with kimchi that’s turned too sour to eat fresh, all is not lost! Try my kimchi jjigae, a Korean stew that tastes amazing with aged, or overripe, kimchi.)

Recipe Sources

Turn on your JavaScript to view content
Vollrath Stainless Steel 8-Quart Mixing Bowl | Vollrath Stainless Steel 13-Quart Mixing Bowl | Nutri Ninja Blender Duo with Auto-iQ | Tae-kyung Gochugaru Korean Red Chili Pepper Flakes | Red Boat Premium Fish Sauce | Totally Bamboo Salad Hands | Ball Wide Mouth Elite Collection Quart Jar | Ball Wide Mouth Plastic Storage Cap | TeamFar Stainless Steel Baking Pan (similar)

The post Quick and Easy Kimchi (Even If You Don’t Live Near an Asian Market) appeared first on Garden Betty.


Spring is here! And to help you figure out what to do with all those weird vegetables and parts you thought you couldn't eat, The CSA Cookbook makes an excellent addition to your cooking or gardening library.


from Garden Betty https://ift.tt/2rMpSmR