My daughter loves to be in the kitchen. (Perhaps a budding cookbook author herself?) She loves to watch me cook and mimic what I do, whether it's stirring up a pot or pouring liquid from one bowl to another.
She loves it so much, in fact, that we've had to install a gate across the opening to our kitchen because it was easier than childproofing each and every cabinet and drawer. Her curiosity and enthusiasm for pot lids, pot holders, tea towels, food containers, and mixing bowls meant they were always scattered on the floor or disappearing into the living room, where she often set up her own makeshift cooking space.
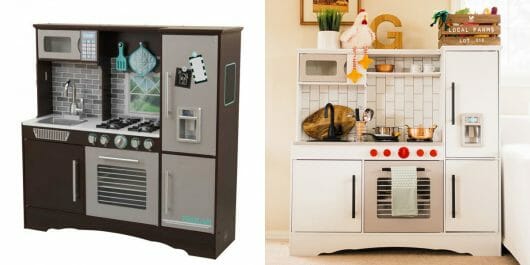
For months I kept an eye on Craigslist for a reasonably priced play kitchen when I realized that my favorite kitchens, the stylish Charlie and Chelsea collections from Pottery Barn Kids, were over $700! Sorry, Gemma, I love you but I could buy a lot of things for the real kitchen for that much. When I found this KidKraft Culinary Kitchen at a steep discount (after stacking a few coupons on the Target site), I decided to jump on it.
At first glance, there's nothing inherently wrong with the KidKraft kitchen. It was fairly neutral compared to all the other pastel or primary-colored kitchens on the market, and it was one of the more modern and realistic toy kitchens I found. I liked the features of this particular model because of the fridge and freezer, the gas burners with clicking knobs, and most importantly, the height of the whole thing.
A lot of toddler kitchens are tiny (no more than 30 to 36 inches tall), and I wanted one that could grow with Gemma for several years. This one is 40 inches tall but still small enough to tuck into a corner of the living room.
And therein lies the problem. Since it was going to live in our living room, it wasn't vibing with my design sensibilities. It was too dark, too juvenile, and I really dislike logos on, well, anything.

I've been pinning beautiful kitchens for the past year as inspiration for our future house (you can see that pinboard right here) and I decided to have a little fun with "remodeling" the KidKraft space into the pint-sized kitchen of my dreams… kind of like a trial run to see if I truly liked the direction I was going in my mind.
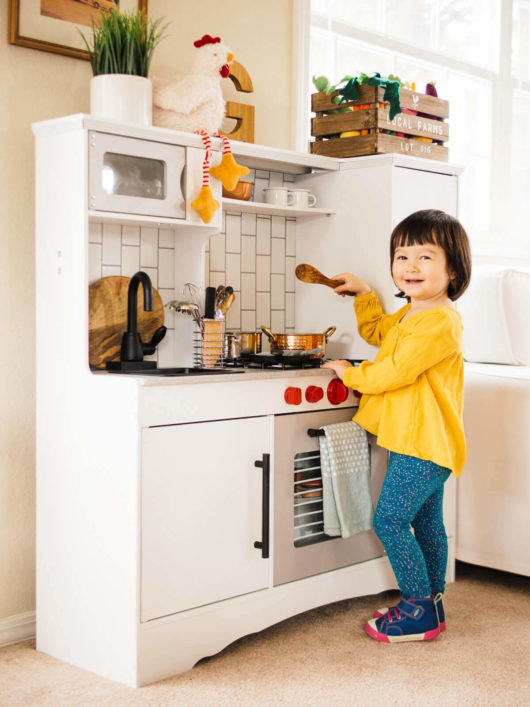
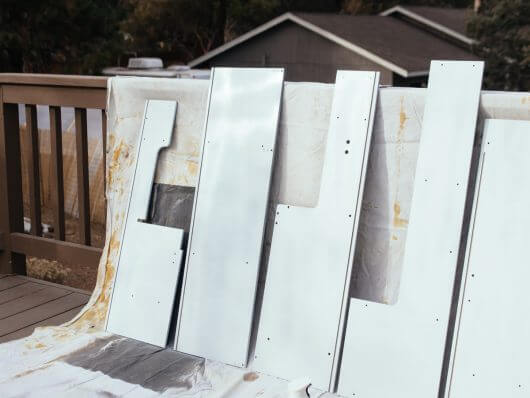
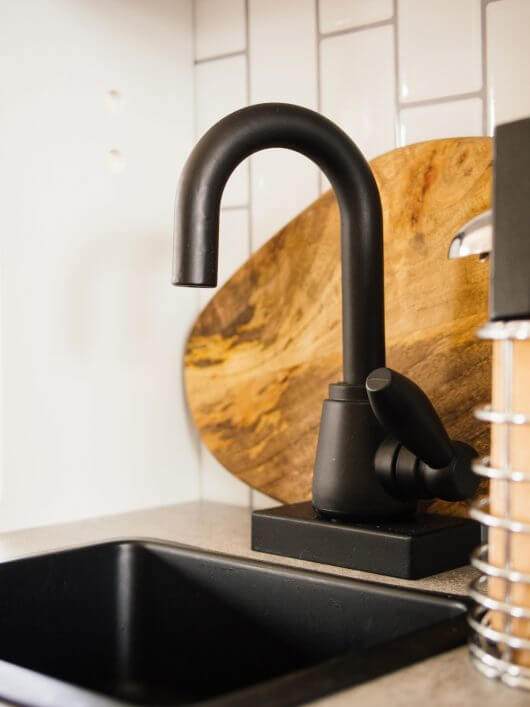
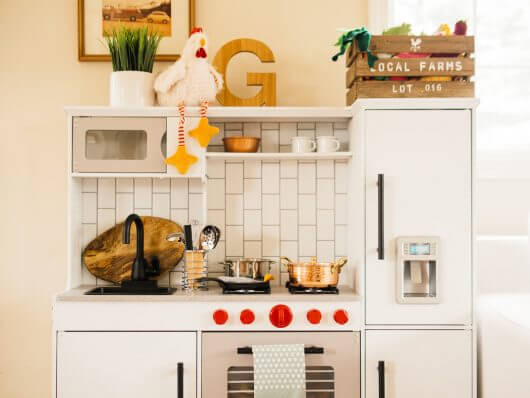
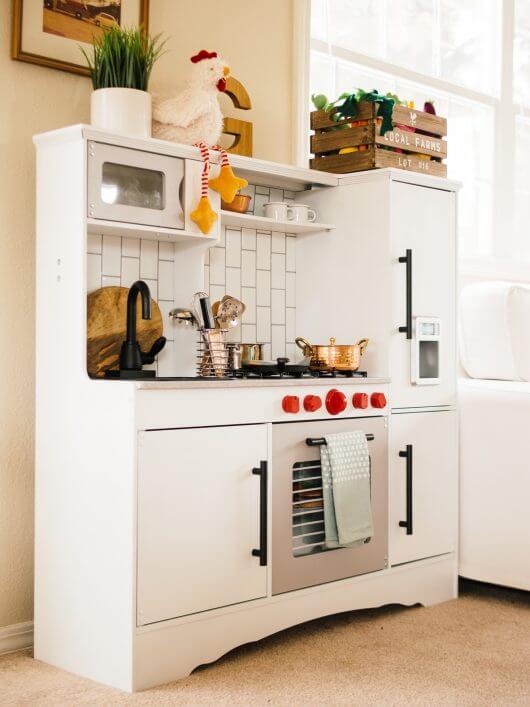
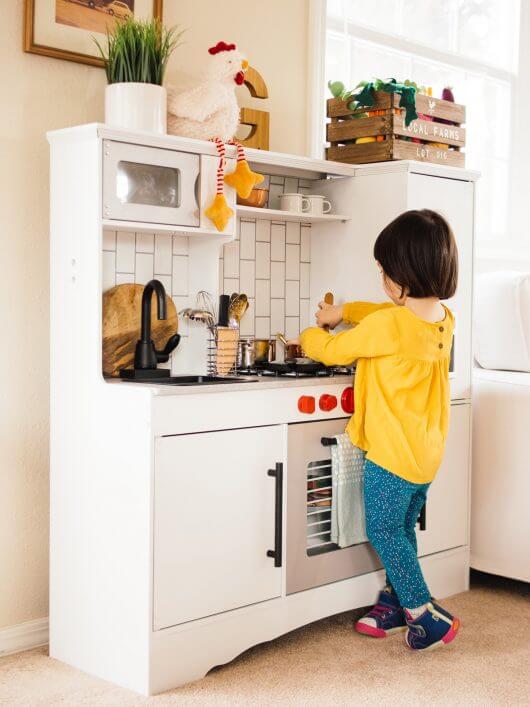
If I could design a kitchen from scratch, my style would tilt toward airy, organic, and modern. I love industrial elements juxtaposed with warm wood accents, natural textures and shapes, and pops of fresh greenery. So in making over Gemma's kitchen, I went with simple white cabinets (painted with this Rust-Oleum spray that saved me from finger fatigue), a vertical subway tile backsplash, and a concrete countertop.
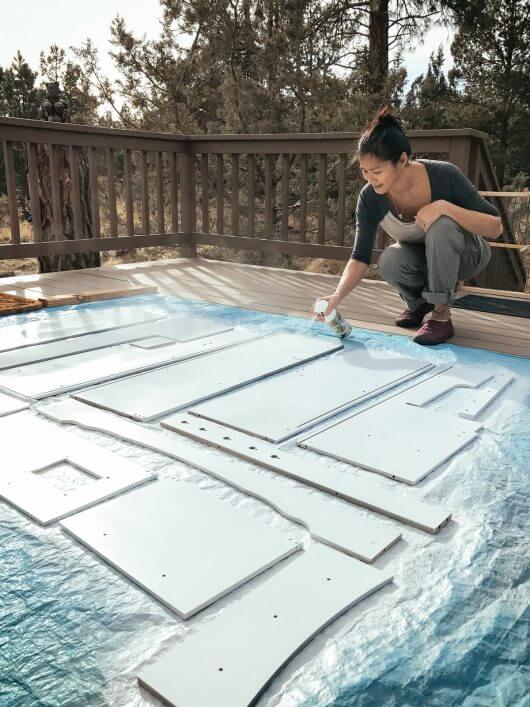

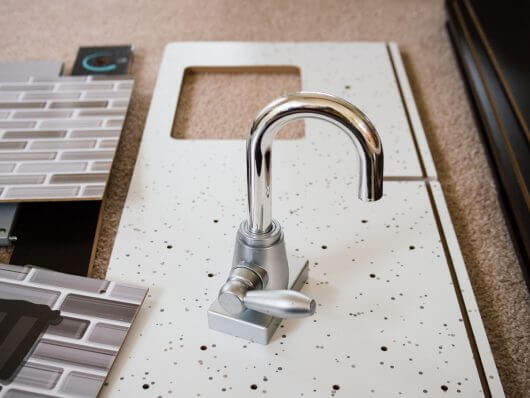
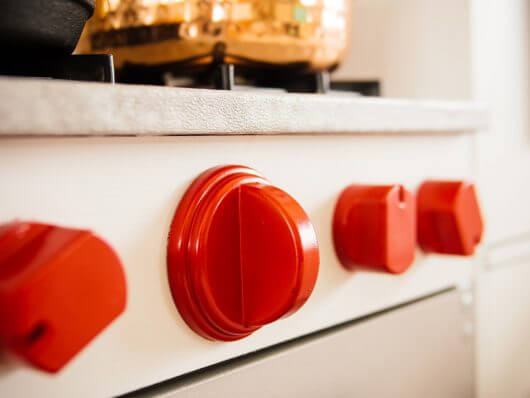
The "tile" is a thin peel-and-stick paper that looks surprisingly realistic. The "concrete" came from a roll of self-adhesive vinyl contact paper (that has the added bonus of being water-resistant). All the handles, fixtures, and sink were spray painted matte black and yes, I even went so far as painting the stove knobs red. (She won't ever know the significance of her fancy "Wolf range," but I can dream of owning one.)

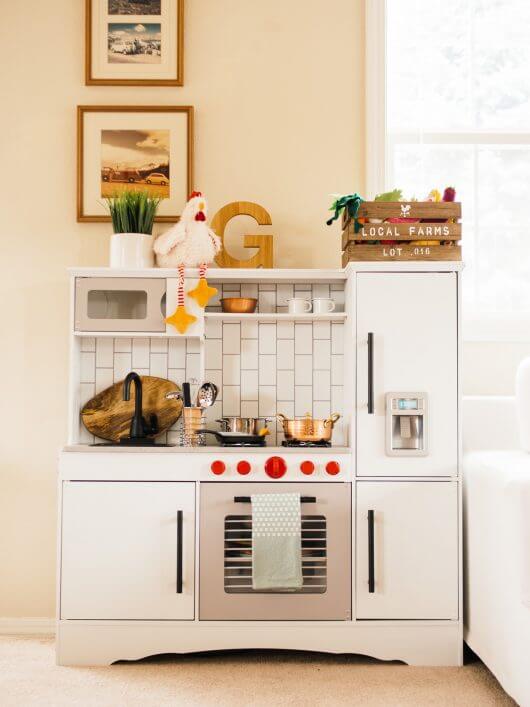
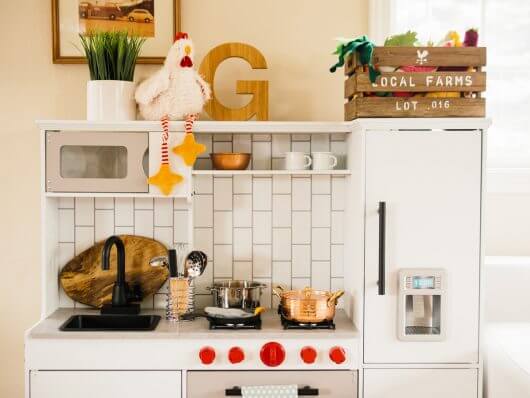
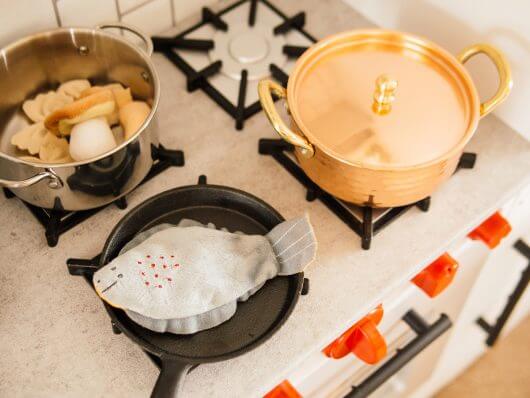
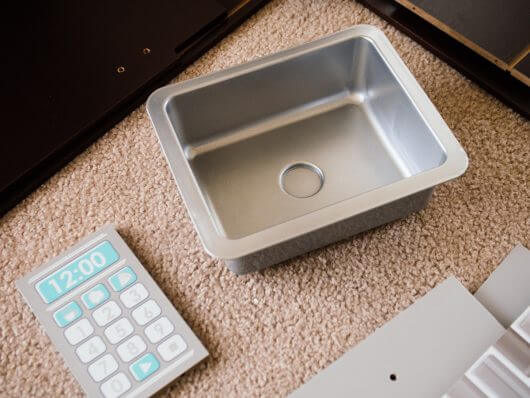
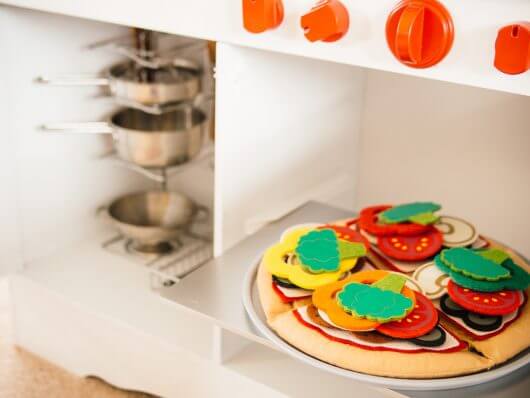
I painted over all the graphics (including a keypad by the microwave and chalkboard on the side), left off the toy cell phone (which also left pre-drilled holes in the side that I'll eventually cover with a 3M Command hook and a tea towel), and added a shelf in the fridge for extra storage. Above the stove, I turned a wooden panel (which originally had hanging knobs) on its side to function as open shelving.

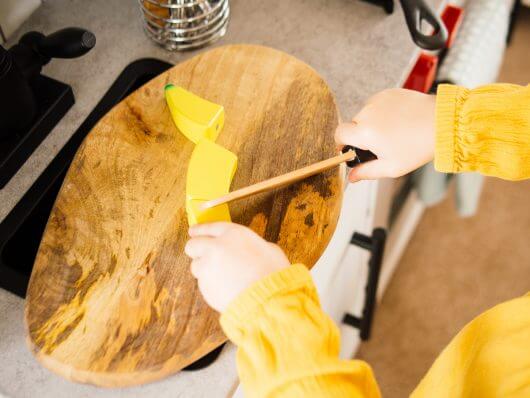
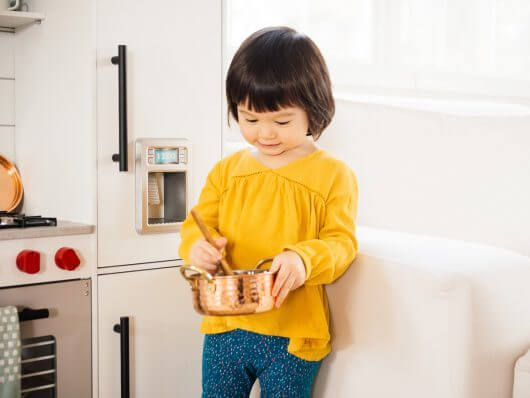
I'd been buying play food for Gemma for a while, and found that I liked felt food and wooden food the best. This particular set of wooden food has magnets so she can "cut" all the fruits and vegetables. (After seeing piles of worn-out Velcro food at public play spaces, I have to say that magnets are the way to go.) This set also stands out because it includes some unconventional ingredients like a dragonfruit, kiwi, and leek.
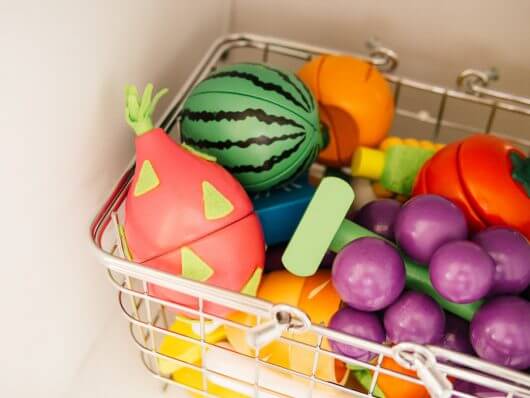

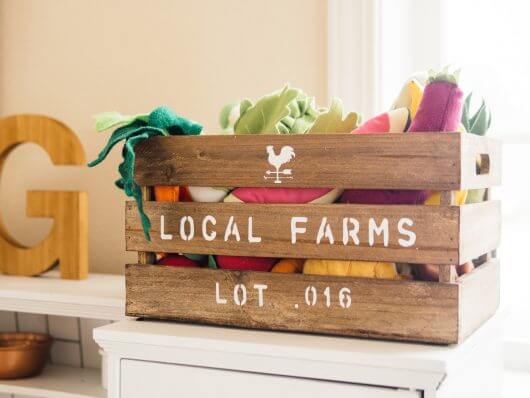
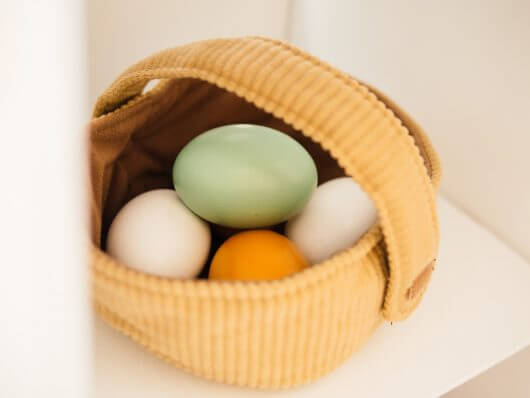
The eggs are my favorite and I think hers, too, because they look just like the ones our chickens lay! It took a little clicking around to find wooden eggs that also came in blue, and these ones are so sturdy and realistic.


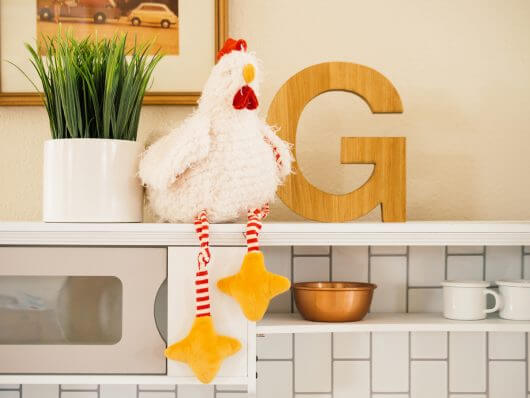
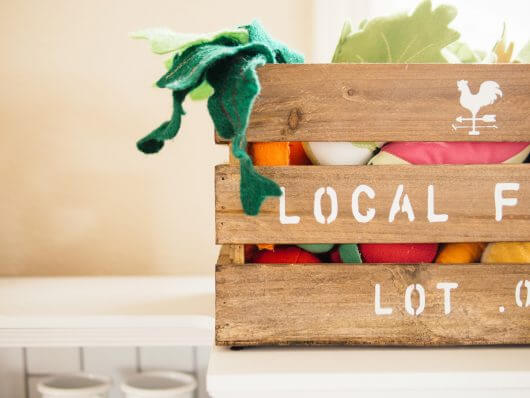
The potted plant (here's a similar one) is fake… for now. One day I'd love to give her a set of potted herbs to care for so she can really feel like a farm-to-table chef! Most of the decor and accessories were found in the sale bins at random stores, and I've linked to similar items below this post.
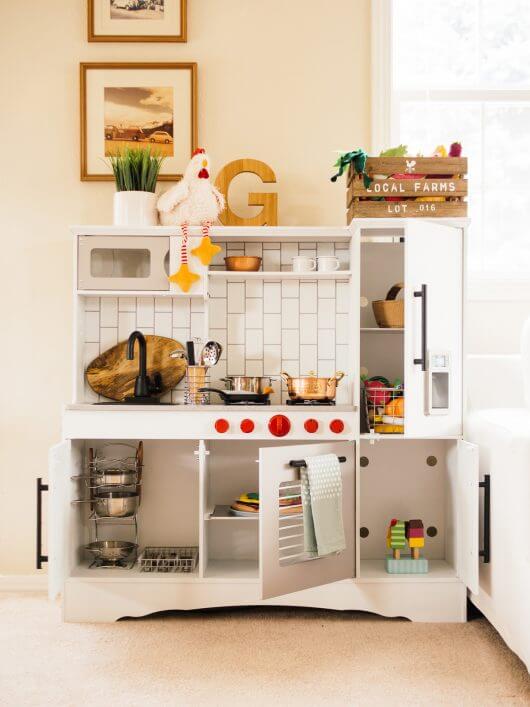
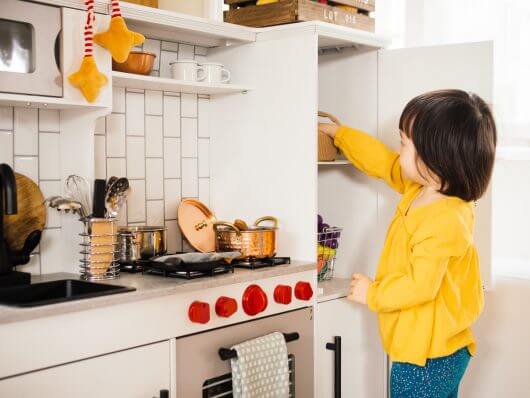
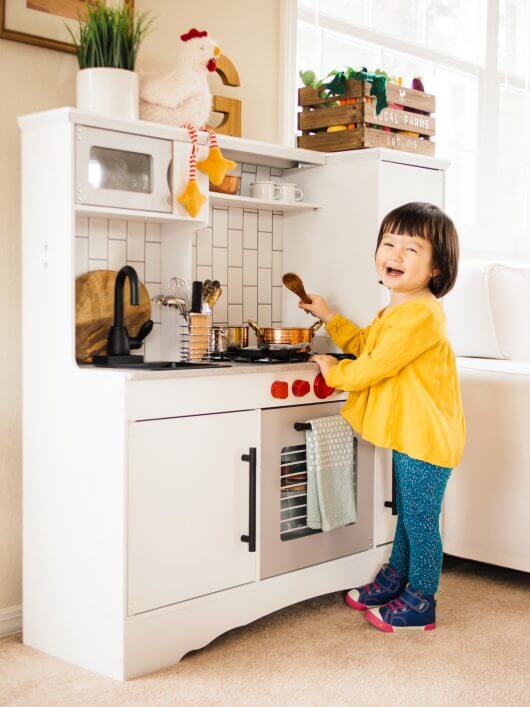
Gemma is obsessed with her play kitchen and it's been our best investment by far, on all counts. She's quite the creative chef and I've been showing her some familiar combinations like pasta, sausage, and onion, but of course, we also make culinary masterpieces like turnip, grape, and egg "soup." It's the only toy that gets daily play, several hours a day. (And she even brings her real food over to the play kitchen and eats stuffs her face at the counter standing up, just like her mama.)
I love seeing it in our living room and yes, I am very much feeling the look of it! I think concrete counters and matte black fixtures are a must in our real kitchen one day…
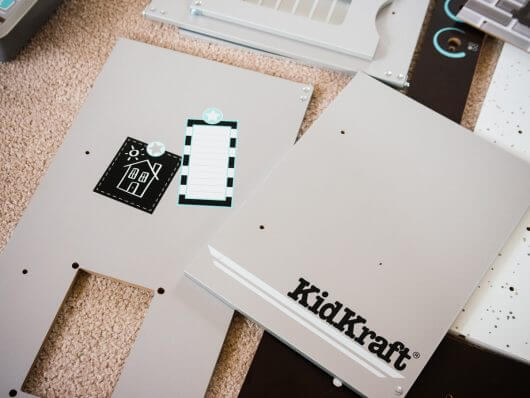
This is an easy project if you start with the kitchen unassembled and put it together once all the pieces are painted. If you want to recreate the look, here's what I used:
- Rust-Oleum Universal All Surface Spray Paint in Satin White (5 cans)
- Rust-Oleum Universal All Surface Spray Paint in Flat Black (1 can)
- Rust-Oleum Painter's Touch 2X Ultra Cover Multipurpose Spray Paint in Apple Red (1 can)
- Rust-Oleum Spray Paint in Satin Clear Enamel (1 can)
- Tic Tac Tiles Peel and Stick Subway Tile in Mono White (5 sheets)
- Very Berry Sticker Stained Concrete Contact Paper in Light Grey
- Rust-Oleum Flexible Smoothing Tool
And because I love a good before and after:
Project Sources
 Turn on your JavaScript to view content
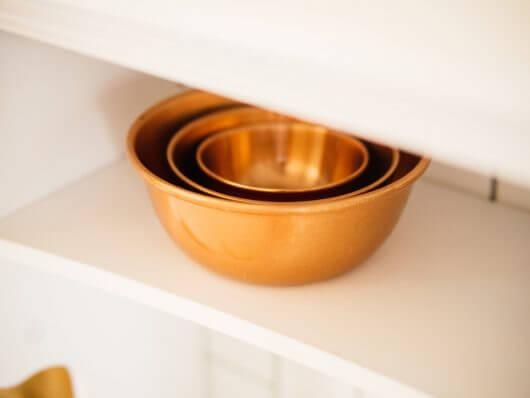
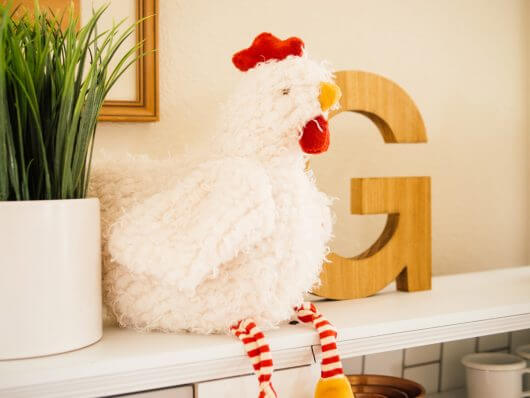
KidKraft Culinary Kitchen | iPlay Magnetic Wooden Cutting Food Set | Under the Nile Organic Veggie Crate | IKEA Duktig Vegetable Set | IKEA Duktig Fruit Basket Set | IKEA Duktig Shopping Basket Set | Melissa & Doug Mix 'n Match Pizza Play Food Set | R. Flower Wooden Eggs | Le Toy Van Ice Lollies | Emalco Enamelware Espresso Mug (similar) | Threshold Pinch Bowl Set | Melissa & Doug Stainless Steel Pots and Pans | Restaurantware Mini Casserole Pot with Lid (similar) | Lodge Miniature Skillet (similar) | Naturally Med Olive Wood Chopping Board (similar) | Melissa & Doug Stir and Serve Cooking Utensils | Melissa & Doug Stainless Steel Mealtime Utensil Set | Spectrum Diversified Small Wire Storage Basket | Velener Artificial Grass in White Pot (similar) | Bunnies by the Bay Clucky Stuffed Chicken | Hand Made Modern Large Wood Letter | MyGift Distressed Wood Storage Crate (similar)
The post A Play Kitchen Makeover appeared first on Garden Betty.
from Garden Betty http://ift.tt/2oWmAMz
No comments:
Post a Comment